If you've followed this series this far, I thank you for your patience and hope you'll find something of interest in today's post. I plan to do one final post after this, a collection of practical exercises to help improve your command of tone. If you are tuning-in to this series for the first time, this post will make sense on its own, but I would recommend checking out the preceding ones in order to get the most out of it.
Recipes of tone
I turn my attention now to providing some examples, in order to show what ‘recipes’ of tone are available. The images are taken from my own practice; however I should add that the history of photography is brimming with examples from numerous different schools. We might think of Bill Brandt and the English School, the endless greys of Paul Strand’s Palladium prints, or the rich and varied tones of Group f/64.
Wide tonal range
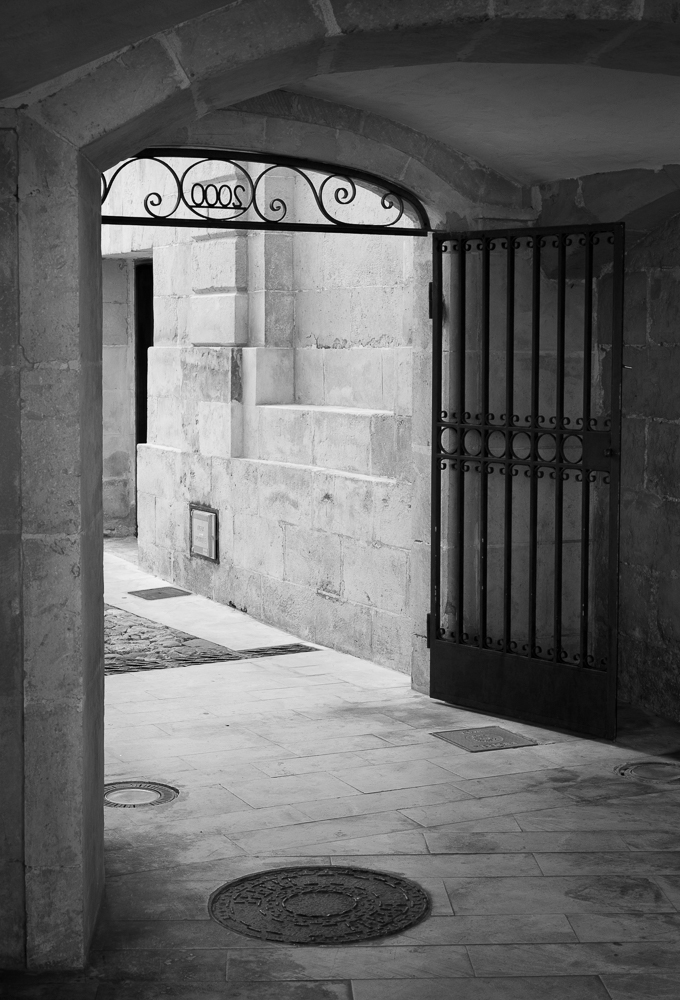
My first example is of a long tonal range, running from pure black, through a range of differentiated greys, and finally to very light grey, nearly white. This image is representative of what is often the default advice given to photographers, namely to ensure that their images contain multiple areas of distinct tone that can please the eye. The histogram looks like this:
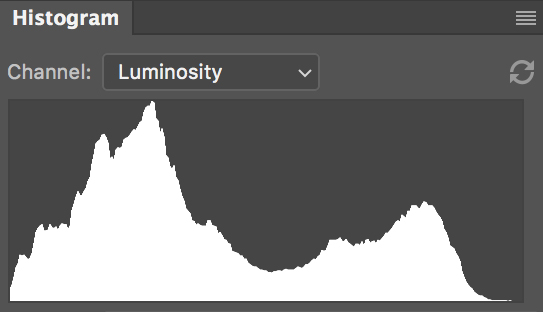
A histogram is a graph showing the distribution of tones. The horizontal axis represents the different tones available, running from pure black on the left to pure white on the right. The vertical axis represents the quantity of pixels in the image it maps, so that the peaks indicate dominant tones. The benefit of a histogram is that it helps you to visualise tonal distribution without being fooled by the image itself. This particular histogram broadly backs up what I said about wide-ranging tone, but you will see that there is more to the story. More accurately, the peak on the left shows the image to be rich in shadow tones; on the right we see a smaller, but also significant, group of light tones. The histogram ‘crashes’ with the left hand side, showing that pure blacks are present, but is still a little way off white on the right. The lightest tones are therefore ‘nearly white’. We might therefore speak of an image that has a goodly tonal range in shadow areas and in the very light greys through the arch.
Pale tone with dark elements

The tonal approach or strategy in this image is to have a largely light image with a smattering of punctuating dark tones. The eye is therefore drawn to the darker areas, which in this case helps to support the inferred narrative.
The gentle light greys of the background provide some substance, but because they fall within a certain portion of the histogram they don’t compete with the main protagonists. They contain subtle modulations of tone (and indeed there are some crisp near white points too) rather than being an undifferentiated mass of a single grey. They don’t interfere, but they are not flat and lifeless. The histogram looks like this:
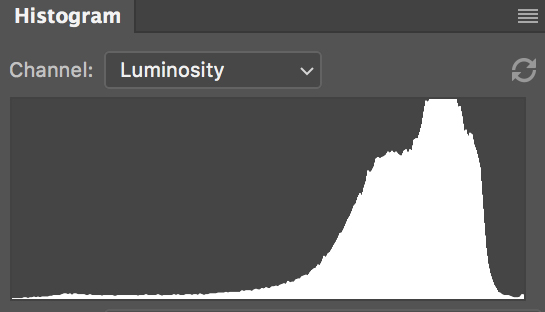
We can see that the very dark tones are not quite black (although the seem like it to our eye), likewise there are very light greys and only tiny amounts of white. The majority of the tones are over to the right, as we would expect given our description.
High contrast

A high contrast image is one in which the darks and lights dominate, grey tones are largely or completely absent. This is a digital image, but were this a darkroom print, we would most probably be looking at a 3 or 4 contrast grade. The window structure is a near silhouette, and is black and very dark grey. The sky beyond has gone over to white. There are some more subtle greys from the middle of the scale in the building, but they take a minor role, as reflected in the histogram:
I am not a photographer who favours high contrast images, and I in fact struggled to find good examples from my archive. I gave this image a little extra contrast in order to provide the illustration here. Such an approach is a very graphic style which favours bold shapes and outlines. In film photography, high contrast leads to pronounced grain and is often associated with low light work with fast films, or average speed films that have been ‘pushed’ in development (exposed at a higher ISO than box speed, with compensated development to avoid negatives which are too thin).
As I searched for images I begin to wonder about my own photographic style and why I had made such little use of graphic contrast. Such thinking leads to interesting questions about habits and assumptions and whether we are not missing out on creative possibilities. Naturally, there is no rule that says one must be using all established approaches to tone in one’s work (life would be very dull if we all did). Yet I think there is a job of reflection that we can do given a knowledge of how tone works and what we haven’t tried. To paraphrase a master printer I admire, how do we know we don’t like the alternative if we haven’t tried it?
High contrast scene, exposed for the lights

This recipe entails exposing for patches of light tone in very high contrast situations. It is very fashionable at the time of writing. The photographer typically applies negative exposure compensation and allows the shadow areas to lose definition. It is like the high contrast approach above, inasmuch as it can be very graphical, but the crucial difference is that the favoured areas still potentially contain a wide tonal range. It is used mainly by street photographers and has the clear benefit of helping to establish areas of interest and narrative interaction. The photographer can make frames within the images, sometimes multiple ones, which connect and juxtapose the chance elements of the street.
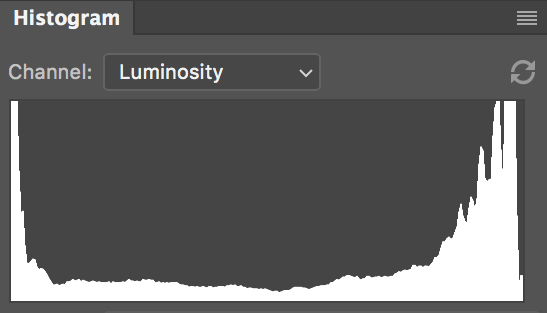
Long, expansive greys
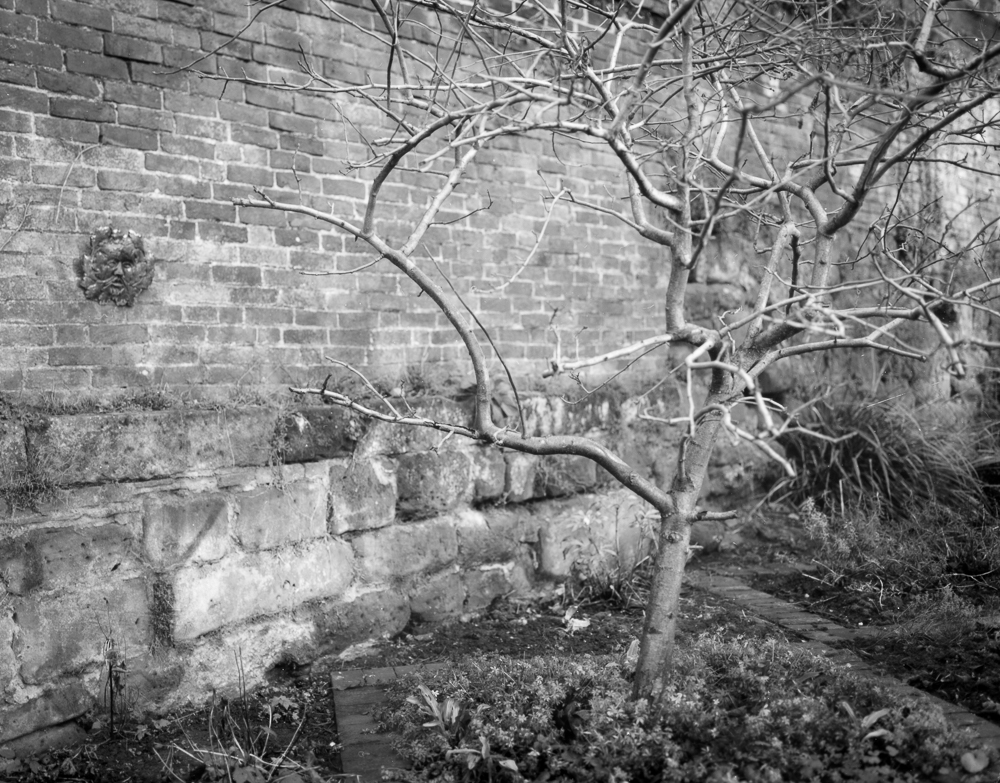
My final formula is one much exploited in the history of photography, and that is of a fulsome range of greys. The idea here is to have midtones that reach outwards such that a harmonious scale of differentiated tone is apparent. The photographer tries to maximise tonal information, downplaying, but not eschewing, the extremities, whilst maintaining tonal transition and modulation. Black and white aren't entirely absent, but they do not present themselves as much as in the 'wide tonal range' recipe with which we began.

The histogram for tree image above shows abundant midtones invading the space to the sides. There is a huge amount of tonal information here and the photographer has to take care not to let the image appear too muddy.
Platinum / Palladium prints are notorious for providing a tonal recipe like this. The don't exactly lack contrast, and certainly not tonal differentiation in a good print, but the scale of grey just seems to go on and on. I don't think it's an accident that the example I've chosen from my own practice comes from a 5x4 negative. Large format has an inherent ability to capture smooth tonal transitions, in no small part due to the sheer size of the negative and the information captured. Tones still need to be managed, of course, through exposure, developer choice and development and dodging and burning, but the photographer is in a strong position to achieve the effect to begin with.
My example was shot on Ilford Delta 100 Professional film and developed in LC29. Delta 100 is extremely fine grained in large format, and LC29 gives wholesome contrast without becoming overpowering. With a negative like this, one can dodge and burn gently to tease out distinct areas of tone, emphasising the range at one's disposal and avoiding 'muddiness'.
Indeed, avoiding a mass of undifferentiated tone is the key challenge in pursuing expansive greys. With such prevalent midtones it is easy to lose a grip of contrast. An image of expansive greys still needs to be tuned with gentle modulations of tone to provide a story and a journey for the eye. Too many similar tones will quickly repel the eye and return a feeling of flatness. The photographer must find subtly and tonal richness without relying on more familiar devices of contrast and distinction. As with so many different photographic media and techniques you can't have it all ways and have to work within the set of compromises you have chosen.
Next instalment: Games to play (the exercises)