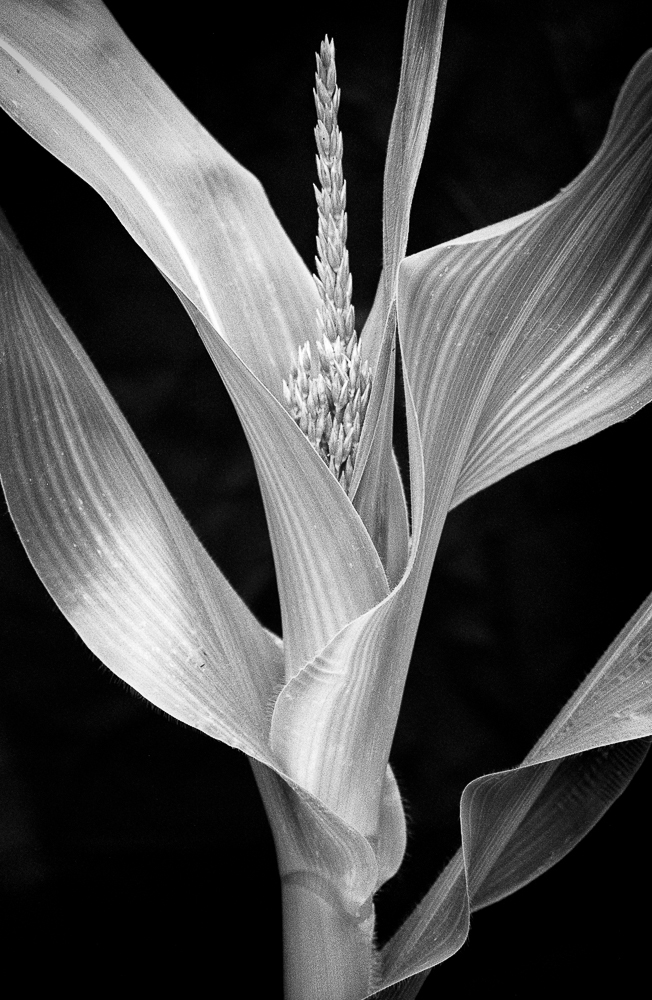
Ilford HP5+ developed in LC29 1+19 6.5 mins 20c

The Zeiss C Sonnar 50mm, the lens most often found on my Leica M6TTL. A mechanical jewel and a fine performer on film.
On buying gear: enjoyment not evolution
A great deal of ink has been spent in the photographic press on the question of the superiority of digital photography over film and the former’s inexorable rise to prominence in the industry. Fear not, for this is not yet another film vs digital tract; I think my own position of a ‘either or both, as you desire’ is a subtext of my blog, if not something I have broached on occasion.
I think a better question, in this golden age of availability of photographic equipment and consumer choice, is ‘what aspects of your photography do you enjoy?’ Then there is a related question: how might an answer help you shape your engagement and buying choices?
I am enamoured with small format cameras that have the potential to make big prints. My Sony A7II fits this bill very well, and there are other Sonys that fit the bill even better (I have in mind the A7 ‘R’s and their iterations, and naturally we could add other makes and models). I like to walk around with a piece of technology with this capability in my hand. The digital viewfinder has the ability to aid rigorous focussing and this is an integral part of large-print making.
Yet I am aware that the experience of using the Sony A7 viewfinder leaves me a little cold. For this part of my photography I look to my Leica M6TTL and mostly black and white film. An uncluttered viewfinder in combination with the most simple operation brings me closer to my subject and lets me focus on the moment. The thought of the exposure being laid on film, together with my understanding of how to process and print my images - in short, my visualisation - is integral to my existential photographic pleasure. (Lest my struggle for the right words imply an otherworldly dimension to this, I think this is a largely technical and mechanical effect - belonging to the medium.) Do my Leica negatives compete with my Sony A7 for large prints? Of course not, nor do I expect them too. The point is that the Leica brings a quite different dimension to my practice.
When I analyse my choices in the acquisition of equipment, I realise that I have made some very conscious decisions regarding what I enjoy, and moreover that I live with the compromises of my chosen media because I see them as integral parts of it. Living with limitations makes you work with them, and before too long you begin to enjoy them too. Critical photographers will ask not just what they need, but whether what they have is still right for them. For me, simply possessing it means that it must continue to be chosen - or be replaced by something else that gets me closer to this photographic enjoyment.
So look not on your equipment as a marker in an evolutionary scale of advancement (the old digital bettering film), its increasing age signalling a need for replacement, but as an indication of your photographic enjoyment. ‘Upgrade’ if you must, not to abstractly improve your equipment, but to better serve your personal and idiosyncratic needs.
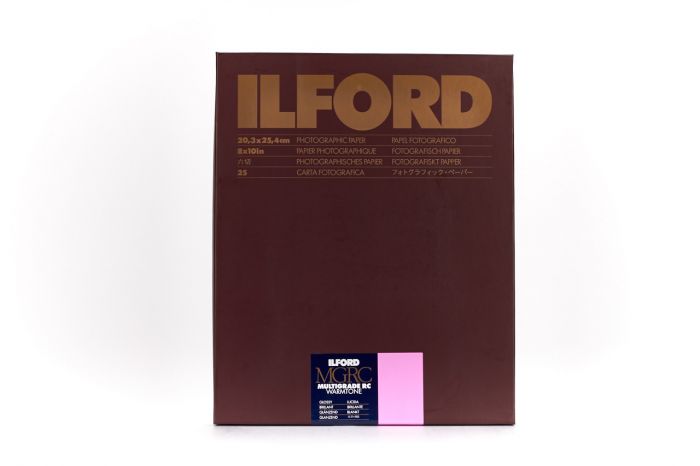
Ilford Multigrade Resin Coated Warmtone paper
Not all darkroom papers are the same
A fine product from Ilford and a mainstay of many darkrooms in this country is Multigrade IV Resin Coated paper. It’s the paper I use most with my students and it comfortably facilitates a novice’s first steps towards a satisfying print.
Not all darkroom papers are equal however, and if you have begun your darkroom journey with a paper such as this, you may wish to consider trying a warmtone paper too. For me, warmtone is my paper of choice, and you will often come across advice to make the switch to it on grounds of an improvement in quality.
Now, I’m not sure it is objectively ‘better’, nor do I quite agree with the advice I sometimes see that it will give you a ‘better’ tonal range (as if merely making the switch is enough to ensure printing contentment).
What it does give you is a different distribution of tones at different grades, and, with the right negative, this may well result in a more satisfying and expansive tonal range. I know it does for me in the vast majority of cases.
Multigrade IV has a very long reach into the highlights at middle grades, while it is somewhat lacking in local contrast in the midtones. If your negative has a lot of midtones, this can result in a muddy and disappointing rendering. Multigrade IV Warmtone on the other hand, has much more ‘punch’ and tonal separation in the midtones, albeit at the expensive of the highlight scale. It gravitates towards a crisp white in the highlights quicker than its cousin, and this may not be an issue in the case of the midtone dominated scene. As is so often the case in photography, this is a question of compromise, or more accurately, of the right compromise for your particular equipment and visualisation.
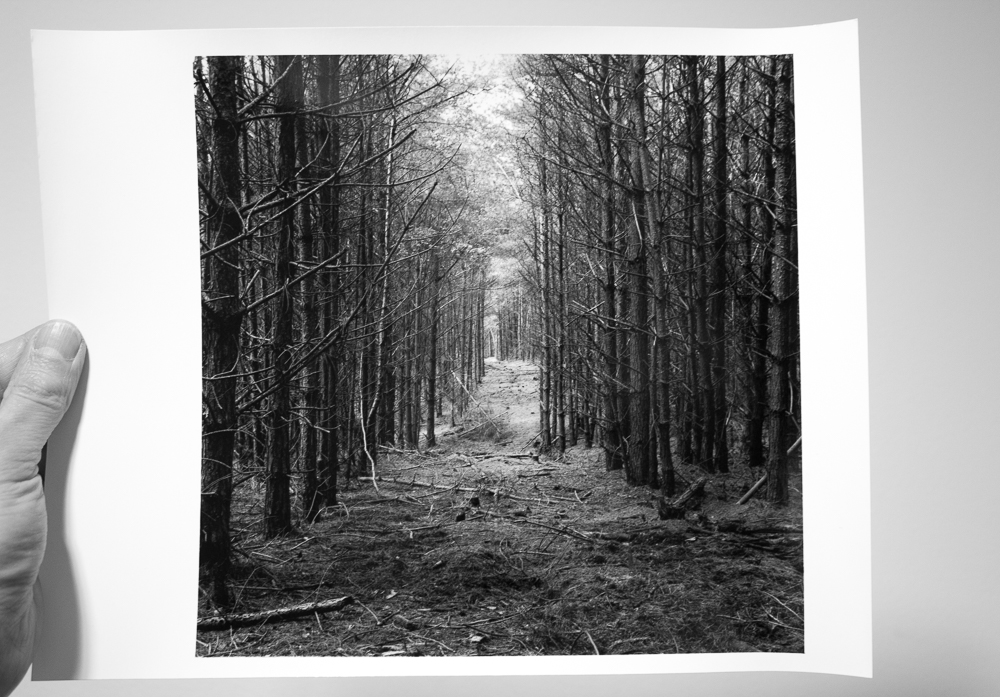
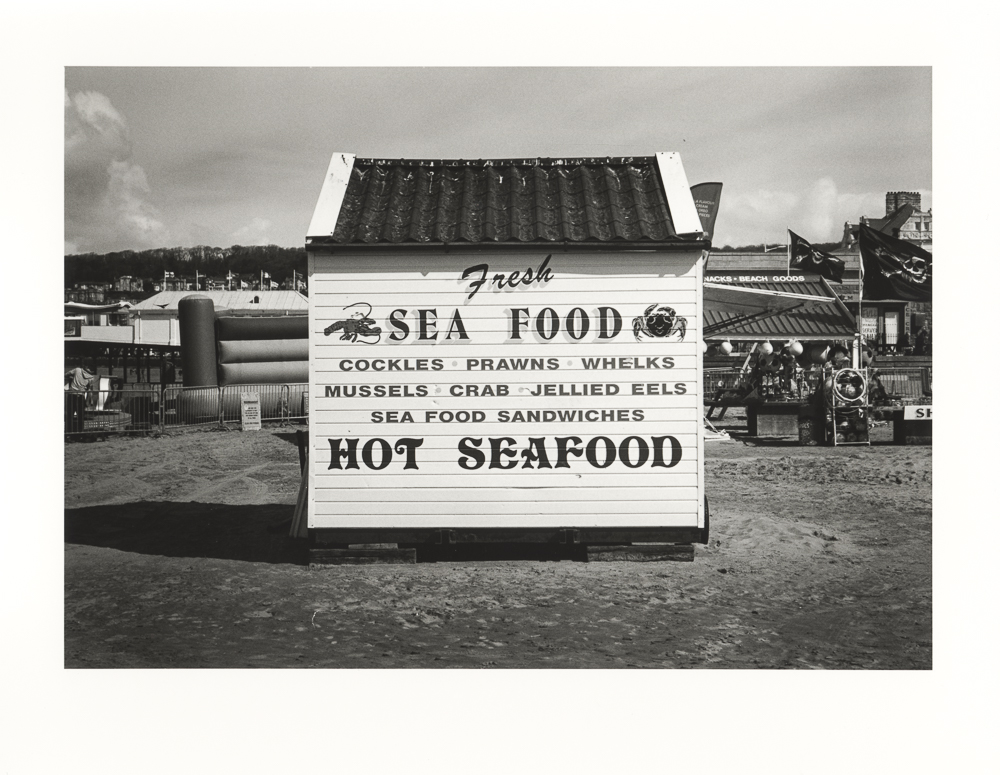
A recent print I made using the warmtone paper in question
It is good darkroom practice to know the tonal characteristics of your paper and to match them to your negative. In reality one paper may very well suffice for the majority of your printing, but if you haven’t tried any alternatives, how do you know? It may be time to try the warmtone option, and to see how it works with your negatives and vision.
If you enjoyed my post, you might like to subscribe to my site here.
Purchases made with Amazon following the links on my site help me cover costs for posting the content I make. I get a small commission from Amazon at no extra cost to you. Alternatively, you can donate directly here. Thank you for your kind support!

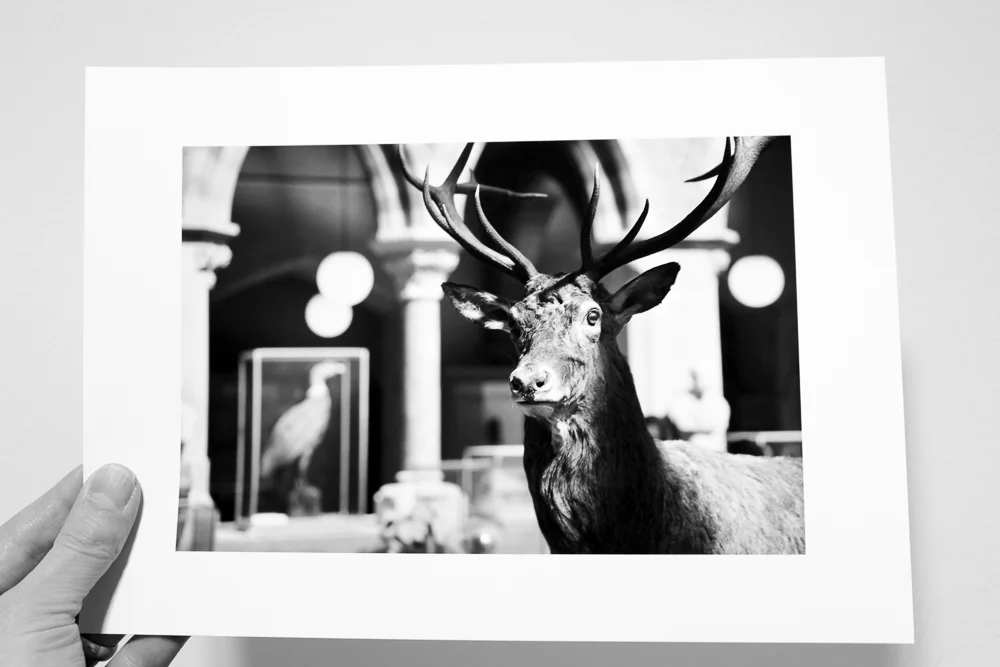
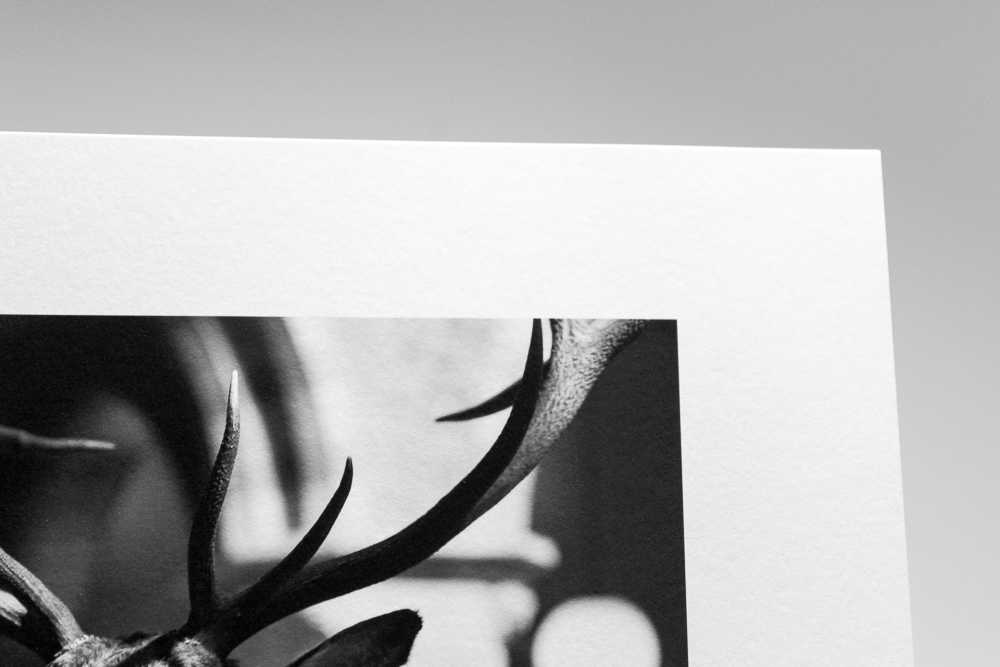
The power of mounting and framing
Photography is a medium with a frame implicitly built-in. The edges of the image isolate a section of reality, and the frame exerts a constant, if unseen, force on our interpretations. Not all images are the same shape, and different formats bring different shapes and image edge ratios.
Hold a small print in your hand and it can quickly disappear into its surroundings. This holds especially for the print with little or no border: with no protective visual buffer, the surroundings come rushing in and the print lost to anonymity.
Give the print some room, some visual, protective space and everything changes. Suddenly the image is contained and exerts its own reality. Our eyes are held much more effectively within the images’ borders and the photographic illusion - that we are looking through a window on the world, or more strongly, that we are occupying that world - holds sway.
This is a matter of aesthetics too. The visual attractiveness of a piece can be given a huge boost when it is placed in a mount (and arguably more again in a frame). I order my mounts online and have them cut to exact dimensions to suit the image. I carefully match the mount colour - and remember different whites have very different ‘colours’ - to the paper colour. A good mount is somehow not noticeable in itself, but surely is in its aesthetic impact.
The only way to appreciate this is to try it. Take an unmounted finished print and treat it to a well-cut mount. Observe what happens: put it on a table, step away from it. Take things further and find a discrete, proportionally matching frame. Try it on the wall. Step away. Return to it. It is my wager you’ll love the image more.
Photography advertising, the invisible influence
The other day I came across a reproduction of a Leica advert from the late 1990s. They were advertising the then latest incarnation of the famous Leica rangefinder, the M6 TTL. As you might expect, the advert is aspirational and contains a carefully crafted studio shot of the camera.
The advert got me thinking about photography advertising, and more specifically its influence on me. We live in a world of sublimated desires driven by consumer advertising. We might not always reflect consciously on the effects of advertising, but they are measurable and real, as the gargantuan advertising budgets of the multi-national corporations attest.
What if my regard for my Leica M6 TTL was a product, albeit an indirect one, of this advert from the late 1990s? I don’t think I remember it specifically, and yet it has something of an uncanny familiarity. I had a little chuckle to myself, rolling this possibility around in my head. It may not be the whole story - I should hope not, a big chunk of my practice nought but the fulfilment of a market instruction - but there is a strong possibility that my desires were at some level shaped by the adverts of the time. It is sometimes said that we acquire in later life the cameras we once lusted after in our youth and when money was too short to make the dream a reality.
I wonder what other photography advertising has helped to shape my choices and paths through equipment and practice? I wonder which ones have shaped yours?
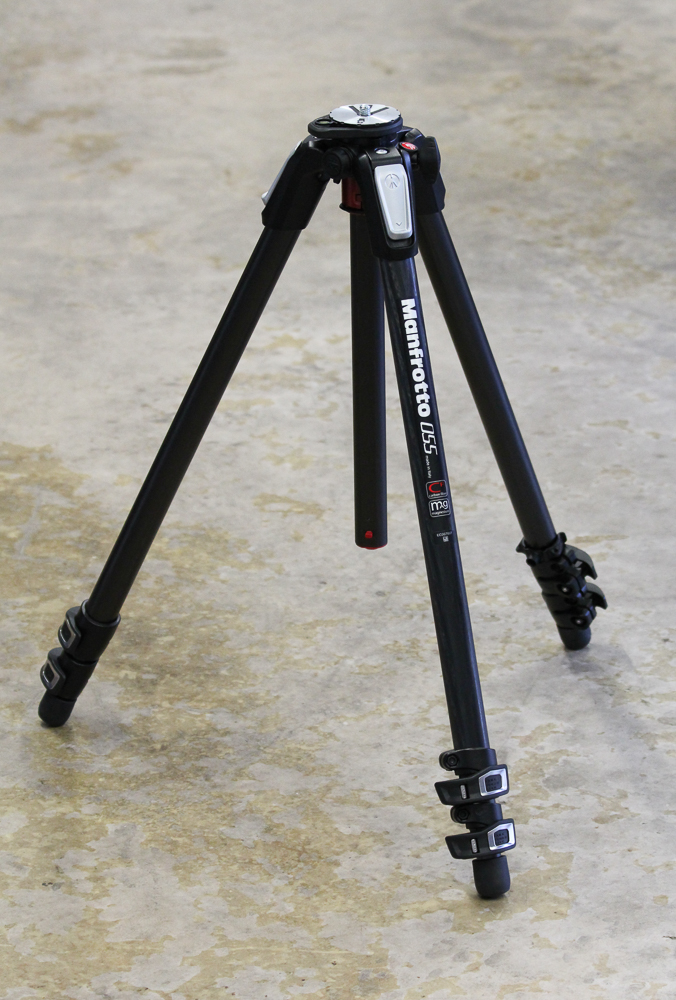
Manfrotto 055CXPRO3 carbon fibre tripod review
24 years of refinements
I can’t be exact, but I believe I bought my Manfrotto 055 series aluminium tripod in 1993. It has served me flawlessly until this day and is still in fine working order. My recent foray into large format photography has, however, prompted me to look critically on its weight. I have no complaints about all other aspects of its performance, but there is no escaping that it is a heavy beast. Heavy tripods and field cameras are not happy bedfellows.
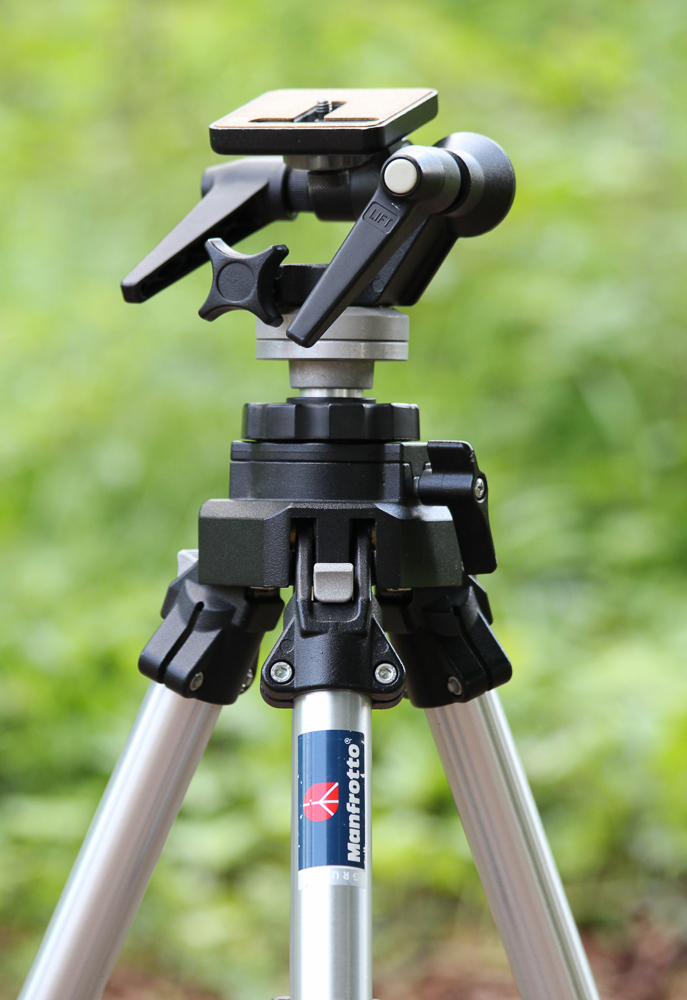
My trusty Manfrotto aluminium 055C tripod.
So it was that I determined to purchase the latest version of the 055 that Manfrotto had to offer (specifically a 055CXPRO3). This is a tripod that sits somewhere in the middle range of the market, not Gitzo price territory, nor, at around £300 at the time of writing, a budget model (and that price is for legs only; you buy the head separately). It seemed a logical thing to do, especially as my original tripod had served me so well, and the 055 is still marketed as a professional tripod designed to carry relatively heavy loads (up to 9kg - safely - according to the specifications). Even more significantly perhaps, the 055 today comes in a carbon fibre option, thus I could make use of the weight advantages of this modern material.
I don’t like twist lock legs, and much prefer the lever type. My original aluminium 055 possesses these, and I wanted to continue to use them in my replacement unit. Levers are easy to open and there is a visual check on whether the legs are locked in or not. Manfrotto have refined the design of these levers over the years and the newer model is easy to open. They are not exaggerating when they say that you can open all the sections of a leg together with one hand. One quirk of the design is that the most open part of the lever is actually the rear. It took me a little time to learn to grab the ‘closed’ side first, and to ignore the more visually inviting rear.

The levers, or, 'quick power locks' as Manfrotto calls them, on the 055CXPRO3.
The tripod is impressively stable, even at full height with the central column extended. It stands 140cm tall, central column in the down position. This suits my height well (I’m about 5’11”), and I can comfortably work at standing height and view the ground glass of my 5x4 camera without bending or stooping (it’s worth bearing in mind that a head adds height, especially if you are looking through reviews and specifications online). I understand that carbon fibre has excellent dampening qualities and it is clear that knocks to the tripod quickly dissipate (there is more of a ‘ring’ to aluminium in comparison). As this is a mini review, a ‘first look’ really, I have done no exacting testing to confirm this stability. However, I can confirm that a 5x4 negative made using the tripod has the sharpness that I would expect from a good support.
There are two particular features that interest me less on this incarnation of the 055. The first is that you can easily switch the central column to a horizontal position, the second is a socket for attachments such as led light panels or small diffusers. Both features would be excellent for macro photographers I’m sure, and may yet prove useful to me. The socket intrigues me the most of the two, and is something I will investigate further. I have a sense that Manfrotto is giving its users some design innovations without compromising basic features and performance.
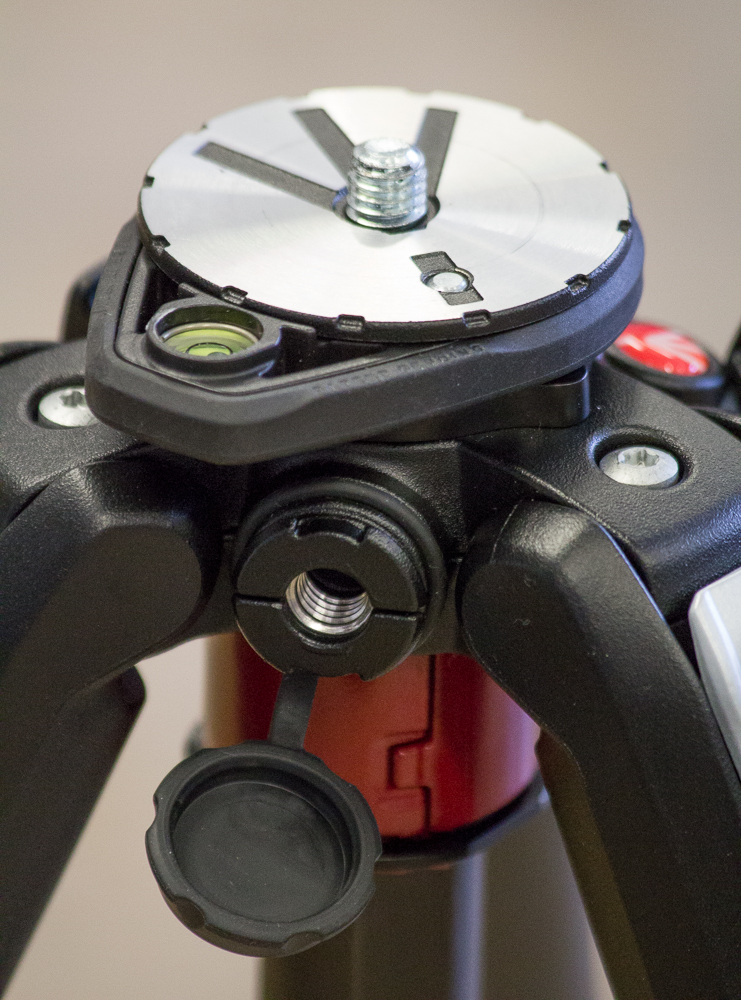
Close-up showing the adjustable spirit level (you can turn in around, so as not to clash with the head position), and the accessory attachment complete with rubber 'plug'.
So finally I come to my main reason for buying this tripod, namely its weight advantage. This isn’t a travel tripod, and it hardly shouts ‘portable’ when you first pick it up. Indeed, when it first came out of the box I did wonder if there was any real advantage over my trusty aluminium version. I think there is a certain psychology to its size and robustness that makes you think it is heavier than it is. We need to bear in mind that this is a light sturdy tripod, rather than a light travel one - a whole different proposition.
Side-by-side next to my old model the weight difference is clear. The old 055 weighs approximately 3kg, and the new one 2kg (both figures without a head attached). Numbers are all very well, but the true test comes in the field. I have really enjoyed using the new 055. You still know you are carrying something (as one would expect with a tripod for 5x4); but the significant if not fundamental weight difference, together with very slick and efficient controls, makes it a pleasure to use. In point of fact, I began to wonder if the ease of operation, even over my still very effective old model, wasn’t the most significant improvement of the newer model. It is light, yes, but it is also effortless to set up and put down. A slender difference, that, in the world of 5x4, makes a difference.
I am happy that I ungraded. A more prolonged test will come as I use it over a longer period, but for now the 055CXPRO3 Carbon Fibre Tripod is looking like a sound investment.

The right compromise: finding your ideal format
A favourite topic of discussion amongst photographers is the question of their choice of format, and whether or not the grass is greener on the other side of the fence. You can see why: there is a considerable investment that a photographer makes in a format, both in terms of cost and time. Nobody wants to labour fruitlessly, not just for financial reasons, but more pointedly at the risk of failing to achieve one’s aesthetic best. Why labour as a 35mm photographer, when my vision would be much more suited to medium format?
The saying ‘the grass isn’t always greener’ teaches that change doesn’t necessarily bring happiness. There is a particular reason why this is the case in the question of photographers and formats. The reason is that all formats have their strengths and weaknesses and necessarily entail compromise. It isn’t just that we may or may not be suited to one format or another, it is that we must learn to harness the compromises of a format before we can judge if it’s the one for us.
35mm is undoubtedly the most mobile of the film formats and allows considerable freedom and experimentation at the shooting stage. The negative being small in relative terms, it poses more significant challenges in the darkroom, 35mm negatives frequently proving difficult to print, especially for the novice. Medium format brings an immediate improvement in flexibility in the darkroom, and will more easily bestow a wide tonal range and controlled grain in the print, but at the cost of weight and size in the field. Large format goes further in this direction, slowing the shooting process and making new demands of planning and location finding, whilst bestowing the luxury of seemingly limitless detail and enlarge-ability. Most enlargements made from large format negatives will be entail much lower ratios (negative to print) than 35mm. The old saying holds true: if it’s easier to shoot in the field, it’s harder to print - and vice versa.
The key question is not, ‘which is the best format’, or, even, ‘which is the best format for us’, but ‘which is the best compromise for us?’ Which weaknesses in our chosen equipment and format can we live with in order best to enjoy its undoubted gifts. When I began to shoot large format, I immediately missed the flexibility of 35mm. C’est la vie. I knew that I would ultimately make a decision as to whether my 35mm work could be usefully and productively supplemented by some 5x4 work, on the premise that 5x4 had a quality I wanted and needed. Shooting 5x4, I would be shooting less 35mm (I don’t think I ever envisaged shooting no 35mm, nor do I), as well as putting up with the ‘negative’ aspects - for me - of large format.
I have concentrated on film photography, but my point could easily be extended to digital and beyond. Have you found the right compromise for you?
#TreePhotoGallery, Part 2
This week I'm pleased to present #TreePhotoGallery, Part 2.
In Part 1, I gathered together a fine selection of tree photographs by photographers on Twitter. The quantity and quality of submissions following my original call for work was so high that I promised a Part 2 - a promise I happily now keep.
I hope you enjoy the work.

Tom Rayfield, Walk The Faded Line.
Tom's delicate piece cocks a snoot at the notion that central placement is to be avoided. The tonality is stunning: it allows the tree to be 'just' emergent; the viewer continues to do a double-take as the tree shimmers like a grey mirage. There is a tonal lesson too: the range is constrained in the middle values - but just look at its effect! Leading lines are at work from the bottom and the sides.

Matias Takala (@elfsprite), Lone Pine, Ilford HP5+ film.
Matias' image works on so many levels. What a fine juxtaposition of the vulnerable tiny growth in the foreground and the expansive water and forest behind. A successful landscape image so often stands or falls on the foreground-to-background relationship. Matias' image is a great example of how to get it right.

Analoguephotolab (@analogue_photo), Orwocolour NC19 film.
I enjoy the pale tonality and somewhat humanoid-like posturing of Analoguephoto's trees. It's shot on Orwocolour, a film with an interesting history and idiosyncratic colour palette. I haven't tried it, but from what I've seen I imagine it isn't a film for all occasions. It's an excellent choice here.
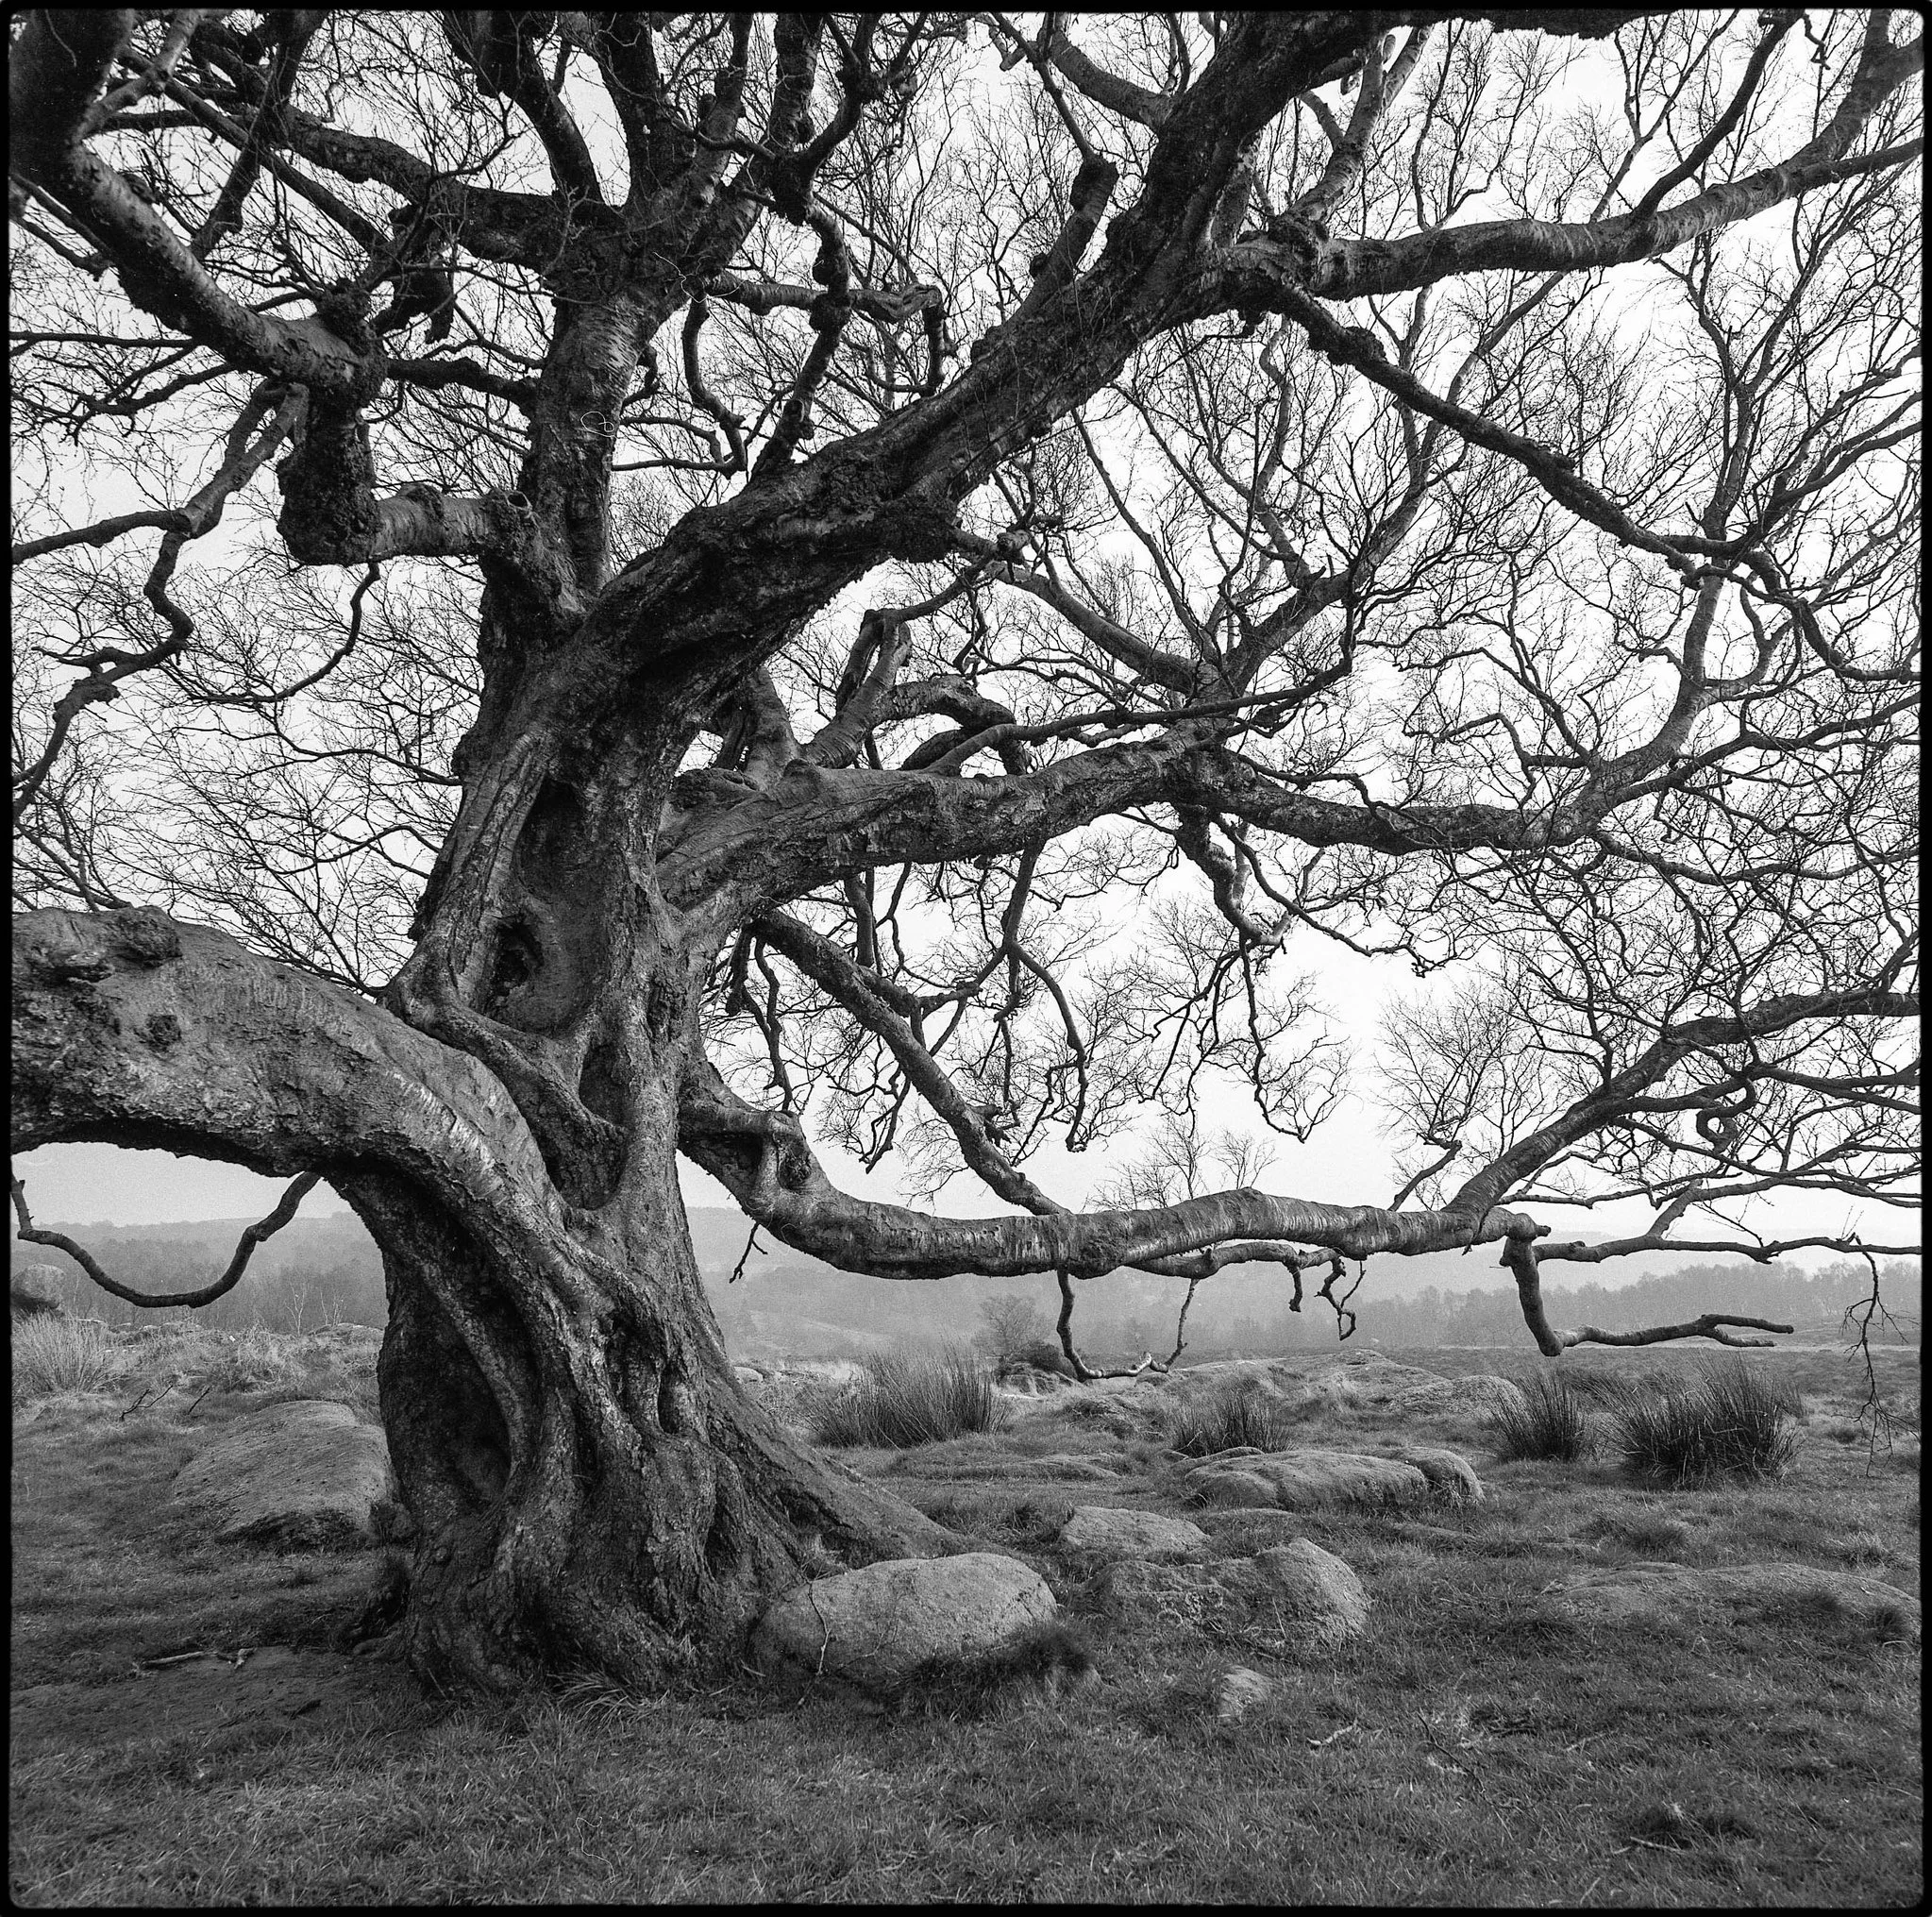
Adi Taylor, Twisted, the Owler Tor Tree, Ilford Delta 100 film.
Great photos take great subjects and add photographic magic. That's exactly the case with Adi's image. Not only is the tree itself brimming with visual interest, but Adi's treatment adds fine tonality and careful composition. The square format can be quite a challenge, but here it reinforces the tree's stocky, powerful form.
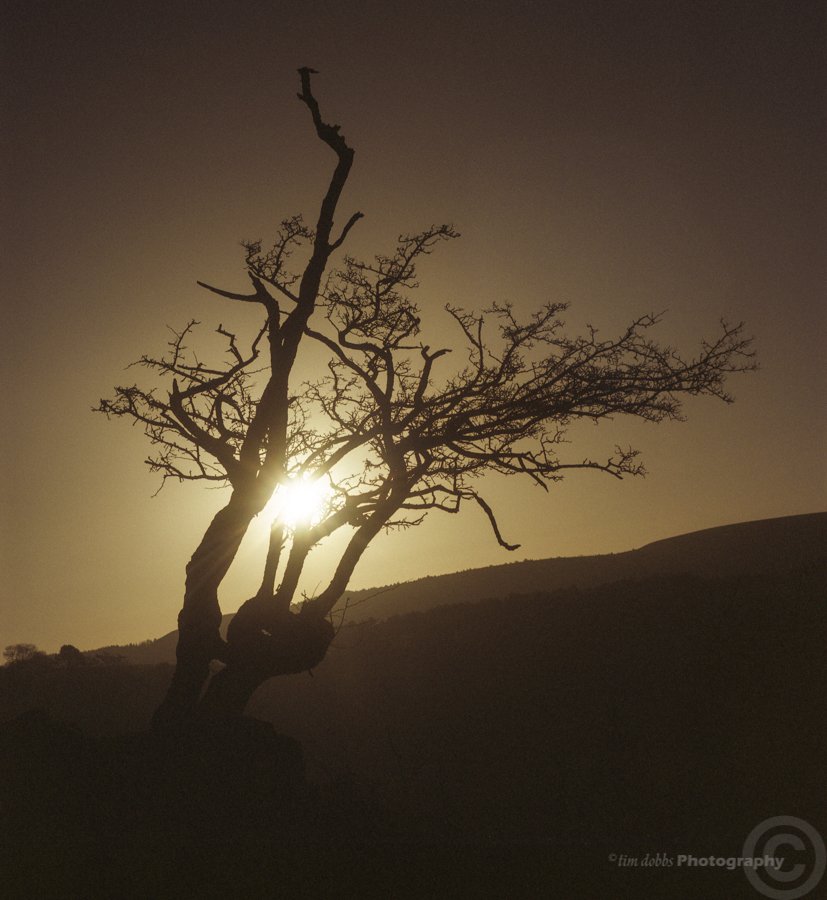
Tim Dobbs, A Tree At Sunset, expired Fuji NPS 160 film.
Some photographs have the power to awaken senses other than just your vision. Tim's monochromatic piece does that for me: I sense a whiff of the early morning fresh air; or the cool rush of the day's end. The sun is carefully positioned, its light breaking through the branches just above the horizon. Like Tom's image above the tonality is subtle, and gives away more as the eye delves deeper and gets accustomed to the lower darkness.

Lina Forrester, Afternoon, freelensed with a 50mm lens and a Nikon D5300 camera.
A clever use of freelensing by Lina conveys the impression of wavering branches and fragile flowers in this poetic black and white photograph. It has something of a dream-like quality, a moment glimpsed but somehow not quite fixed, as a photograph should. Transience is key.

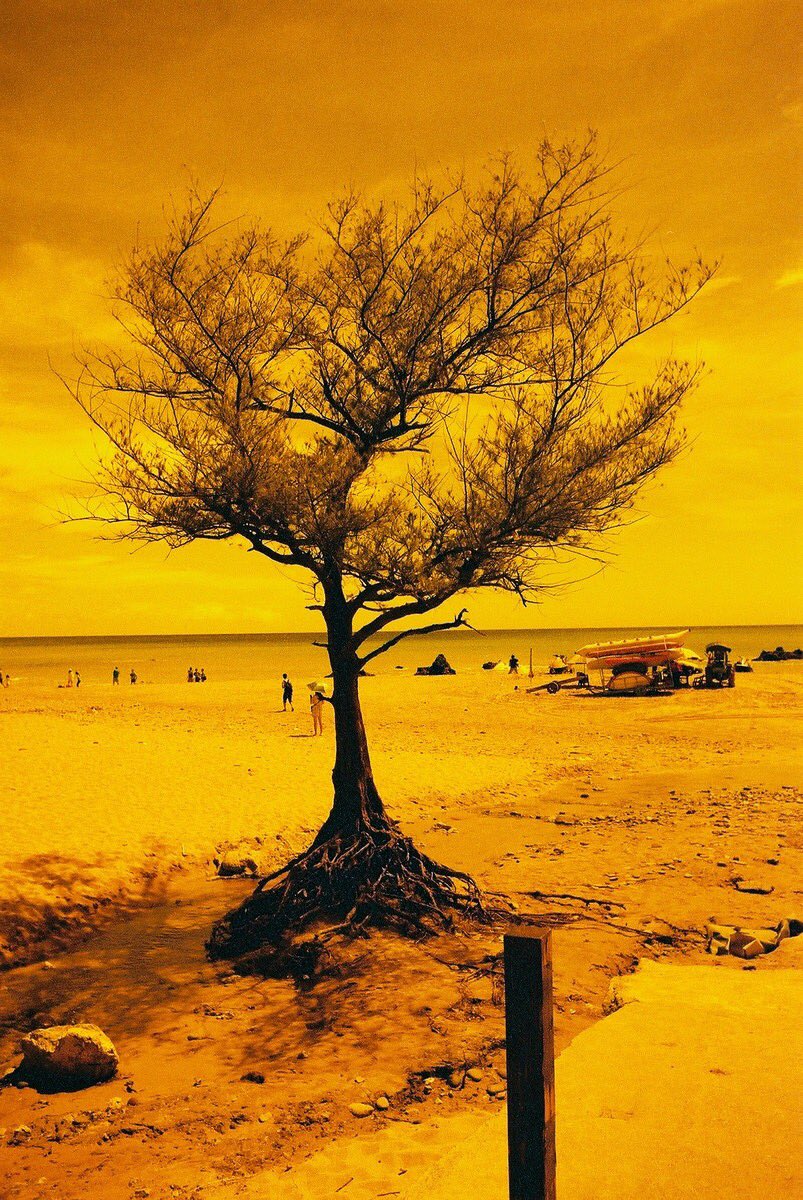
Sandeep Surmal, Southbank, London, Ilford SFX film with Infrared R72 filter.
I see so many infrared images in which the effect itself is dominant. They seem to say first and foremost: 'look how infrared transforms our visual world'. Sandeep's image uses the infrared effect, for sure, but it does more photographically, because the effect is in the service of the photo, not the other way around. With their leaves transformed, the trees mirror the lamp posts, leading our eye down the Southbank promenade. The partly ghostly people on the left add a lovely visual punctuation mark.

Lucy Wainwright, Fuji Superia 400 film.
Lucy's image is one which reminds me why I enjoy shooting film so much. It's hard to put into words, but the medium, with its bluish cast and gritty grain, add a gravitas to the struggle of the stalwart, gnarly tree. It's an image of survival: of steadfast resistance in the face of nature's unforgiving side.
A fine image to end a fine collection.
Here's a quick link to #TreePhotoGallery, Part 1 in case you missed it.
If you enjoyed my post, you might like to subscribe to my site here.
Purchases made with Amazon following the links on my site help me cover costs for posting the content I make. I get a small commission from Amazon at no extra cost to you. Alternatively, you can donate directly here. Thank you for your kind support!
Hahnemühle Photo Matt Fibre 200 gsm paper

Make a start in fine art inkjet printing
There is a beguiling range of inkjet printing papers available on today’s market, many of which have specialist characteristics and applications. If you are new to inkjet printing, or indeed are simply in the mood for a different support, it can be difficult to know which paper to choose.
I have several paper types that I regularly use, each for a different purpose. Among these is a category that I might call the inkjet equivalent of a straight print in the darkroom. Having made a first stab at processing an image, I want to print it out and begin to make decisions on how to proceed. I will return to processing, print again, and repeat as necessary. Towards the end of this procedure I will include the final paper, usually one of the most expensive available. The paper I use first will be an ‘economical’ one (for reasons of economy, naturally), but, crucially, must not be so far removed from the final type as to introduce a jump or glitch in the process. It’s pointless to work on a draft version of a print, only to have to start processing from scratch once the end paper is introduced.

A paper has recently come to my attention that I have considered for this draft / straight print role. It is Hahnemühle Photo Matt Fibre 200 gsm. You have to tread carefully with affordable matt papers because at the lower end of the market you may not achieve the kind of quality you need. In point of fact, I remember thinking for some time that printing on matt supports wasn’t worth the trouble - until I discovered fine art matt media. The problem was that the image was rendered with a noticeable grainy structure (quite unlike film grain, incidentally) that gave the image a rather un-photographic quality. A quality matt paper will not suffer this, rendering your image in a smooth and photographic fashion, with good tonal transitions.
The price point of Photo Matt Fibre suggests that it is an economical but not a budget paper. It is significantly cheaper that Photo Rag Matt (one of my favourite final print papers), at nearly half the price. Hahnemühle themselves advertise it as a good first paper for fine art work. I’d like to second that view here and recommend it myself as a good place to start.
A draft print on Hahnemühle Photo Matt Fibre 200 gsm. Made using an Epson R3000 printer.
I like two things about this paper. First, it has the aforementioned quality of rendering a photographic-type image that I consider the sine qua non of inkjet printing. Second, it is not a thin paper at 200 gsm, and comes with a slight texture reminiscent of more expensive fine art matt papers. I can therefore get very close to my final print with this media, before using my preferred exhibition paper.
Good tonality, the ability to render sharp details and a gentle fine art texture are qualities of Photo Matt Fibre.
There are two possibilities here then, as I see it. Either you’re starting out and are on safe ground with this paper as a first matt paper choice and a taste of fine art printing; or you’re already printing and might consider it as a replacement to your draft matt. In either scenario Photo Matt is a sound, keenly priced option.
You can buy Photo Matt Fibre via this link from Amazon:
If you enjoyed my post, you might like to subscribe to my site here.
Purchases made with Amazon following the links on my site help me cover costs for posting the content I make. I get a small commission from Amazon at no extra cost to you. Alternatively, you can donate directly here. Thank you for your kind support!
#TreePhotoGallery, Part 1
If you read my prior post you'll know this gallery has come about thanks to a whimsical call for photographers to confess with me an obsession for trees. Credit must be given to @EMULSIVEfilm and @AukjeKastelijn who were party to the original conversation. They do, however, take no responsibility for the gallery that follows, and the editorial choices and omissions are mine.
The response to the call has been quite amazing. Some very fine work has been shared, unfortunately more than I am able to include here. I clearly did, however, feel it was a pity not to give at least some of the work a home, hence this gallery. I have set aside more images for a 'Part 2', so watch this space.
I hope you enjoy the gallery.

Dustin Veitch, First Light August 2016, Ilford FP4+ film developed in Kodak HC110 1+100.
An ethereal atmosphere dominates Dustin's black and white image. The play of light and shadow has an intangible quality, as if we could be looking at multiple exposures.
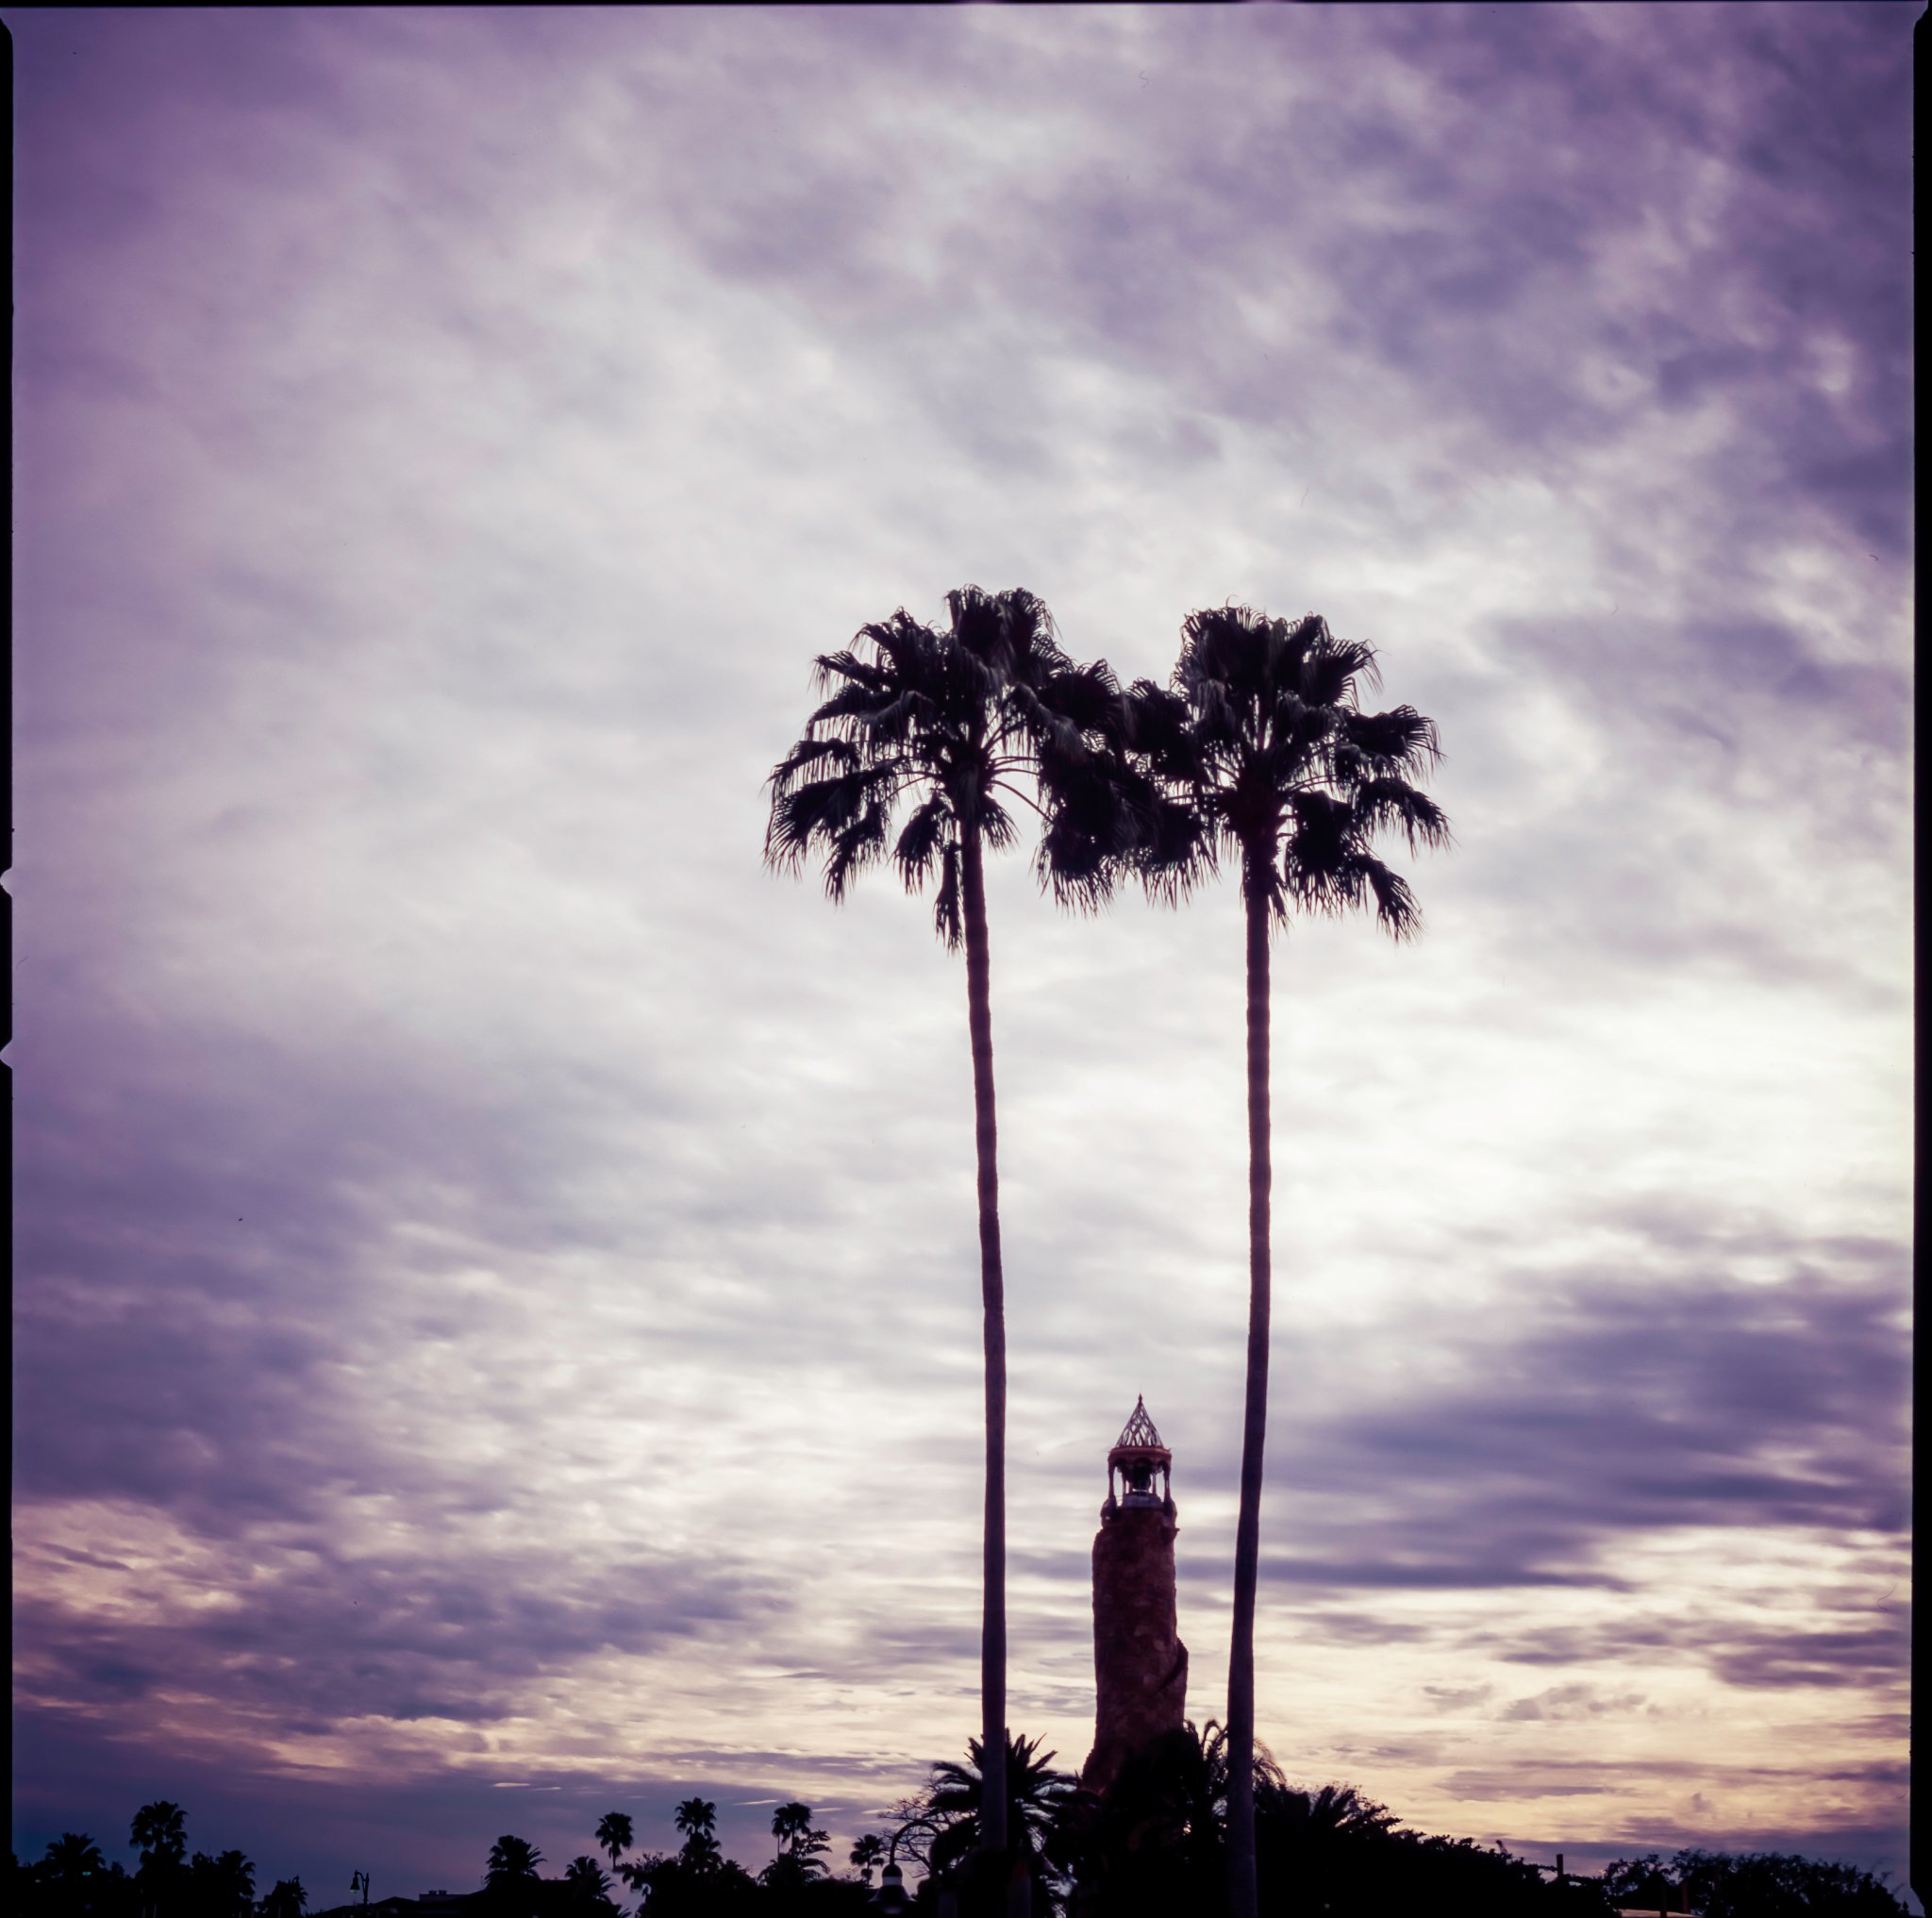
Ribnar Mazumdar, The Sentinels, Fuji Veliva 50 film.
A colourful sky pervades Ribnar's image, but it is the play of scale that intrigues me. How big are the two dominant trees? The tower in the middle? The tiny trees at the bottom of the frame? A great use of composition and scale.

Matt Parry, Glowing Green, Provia 100f film.
Matt's image has a strong graphic structure punctuated by the delicate, back-lit emerging leaves. A contrast of the old and immutable trunks, and the young, delicate regrowth.
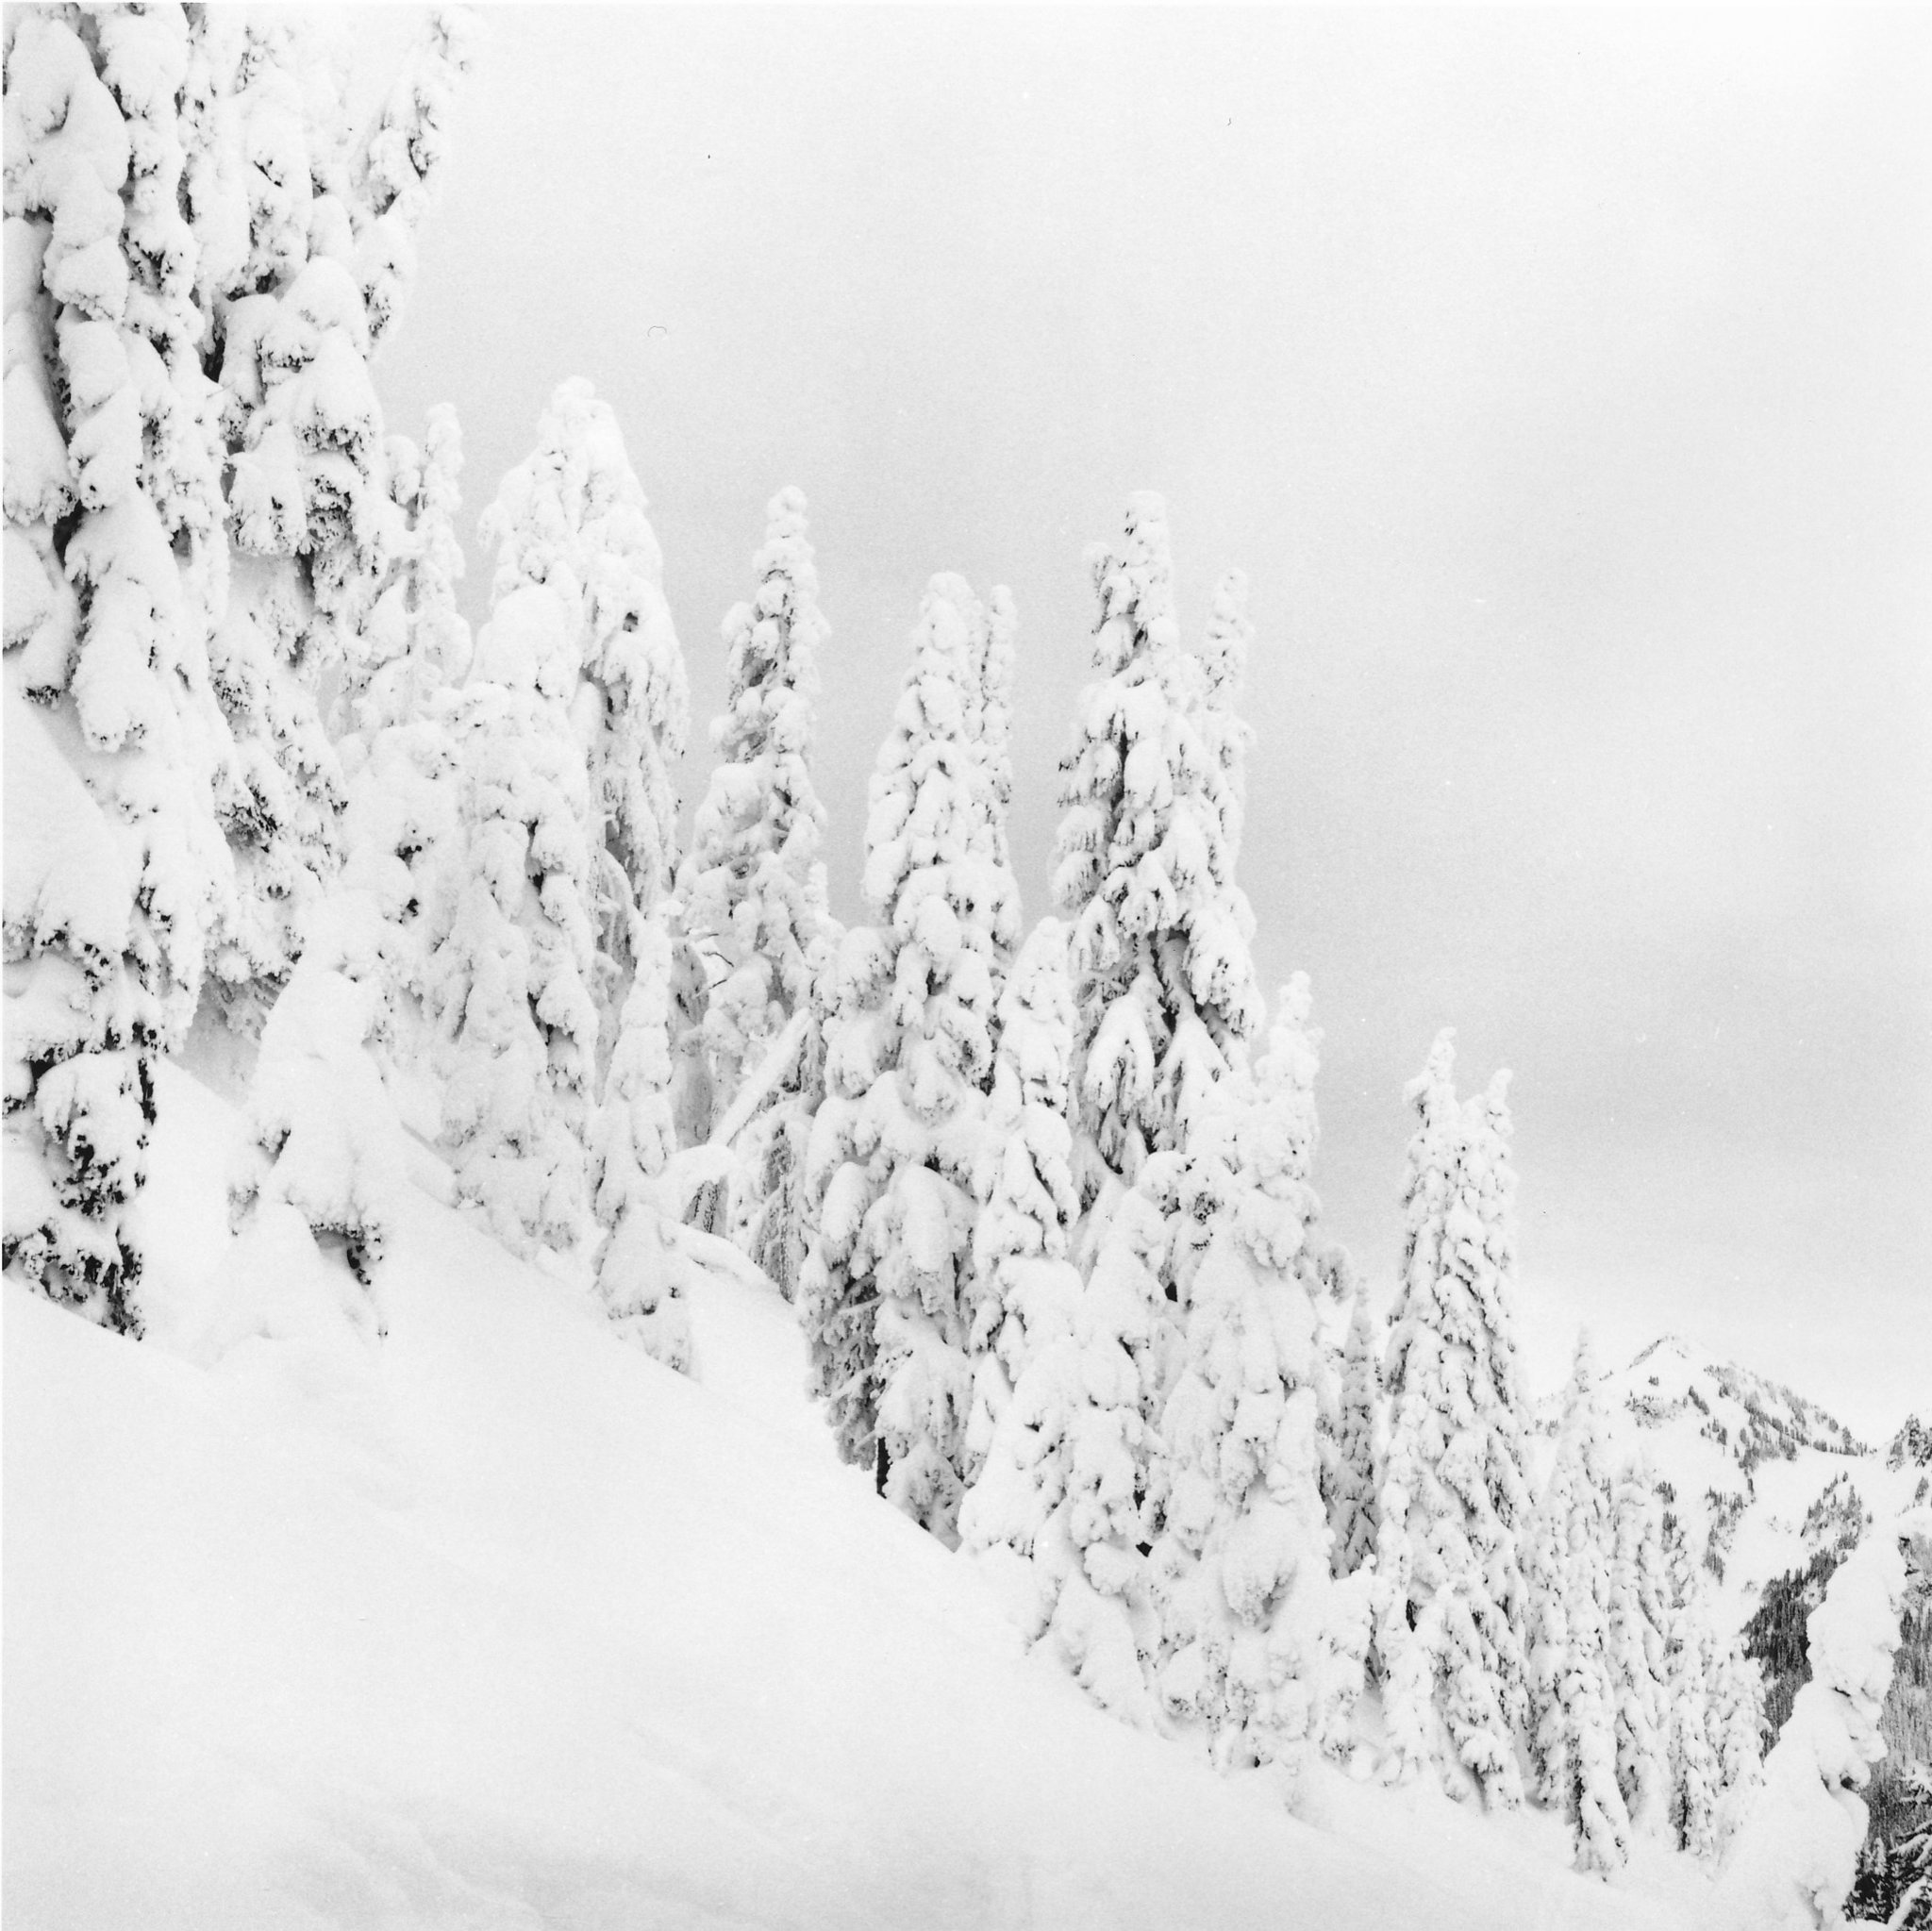
Monika (@DrMarsRover), Silence, Paradise, Mt Rainier, Ilford HP5+ film.
In this near monochromatic image by Monika, trees take on the disguise of fallen snow. There is a palpable sense of the weight of the snow and the resistance put up by the unyielding trees. The strong diagonal from top left to bottom right visually reinforces this exchange of forces.

Barnaby Nutt, 200 Seconds Over Ullswater, shot digitally using a 10-stop neutral density filter.
I particularly enjoy the crisp, shape-defining light in this neatly composed piece by Barnaby. The details are fine and the tonality expansive.
You can find more of Barnaby's work over at his website. Click his image above for the link or go to barnabynutt.com.
Emulsive (@EMULSIVEfilm), Kodak ULTRAMAX 400 film shot at EI 25.
Emulsive's submission seemingly hails from another planet. It was born through experimentation, specifically pre-heating the film before development, that resulted in the strong colour cast. The treatment somehow suits the character of the tree, its shape and demeanour.

Nick Trujillo, Lone Cypress, Pebble Beach, CA, Fuji Reala 100 film, developed using an Arista C-41 kit.
The choice of film and development have undoubtedly played a role in Nick's fine image. There's a relationship between colour palette, format and subject matter that sings to my eye. I also admire the careful framing - it can be really hard to manage the closer elements in such shots from afar.

Philip Constant, Two Trees, Santiam Hills, Ilford Delta 100 film, lab developed by Ilford USA
There is a poetic simplicity to Philip's image, an emptiness, and yet a dialogue. The two trees stand separate (and are compositionally in danger of becoming unrelated), and yet they feed-off each other, two central characters in some undisclosed drama. The tonal key is just right, and clouds both lend interest to the sky and bridge the central divide.
Thank you for looking, and I hope you enjoyed the work as much as I did. Please do look out for the second instalment, coming soon.
#TreePhotoGallery
Yesterday I started a thread on Twitter about trees. The premise was simple: photographers love to photograph trees, so share a tree photo if that's you. The response was overwhelming. I have shared some of the initial responses, but as I began to lose track I started to think that the images deserved a home.
To make the exercise a little more interesting, I intend to publish a small selection on this blog, along with some brief comments as to what I like about each image. A mini, appreciative, review if you will. If I have the images, I will publish more than one instalment.
There are some terms and conditions, as ever, to this, so please do take note. I'm selecting according to my own taste (and as a confirmed tree photographer obsessive). Please don't be offended if your image isn't selected: it's not a verdict on your work, and reflects more my predilections. There may simply be some aspect of film or processing choice and so forth that I'm just not into. Participants agree to publication on this website, and therefore license me, without charge, free and unhindered use of their image. The copyright will of course remain with the photographer. I will also share chosen images on Twitter and possibly other social media channels, and so participants agree to this too.
To enter please share the tweet below and post your image using the hashtag #TreePhotoGallery. If you already used the hashtag #TreePhoto, you're already in, and I will contact you for permission if I select one of your images.

The fruits of my recent 5x4 labours: a small but magical contact print. The tonal range is impressive for a straight print. Paper is Multigrade Art 300, which explains the textured surface. Film is Delta 100 developed in Perceptol.
Large format magic
In the last post I wrote of my frustrations with 5x4 in my early use, and stated my belief in the ‘possible satisfactions’ of the format. To put matters bluntly, there’s simply no point in persisting with a format if those satisfactions can’t be acquired. At stake is a considerable investment in time and money, and, worse still, one’s efforts as a photographer. Why invest in a format if it doesn’t enable you to realise your vision, or at least a sizeable part of it?
Having developed and contact printed some negatives this week, I’ve been able to reflect on those ‘satisfactions’ and to provide some evidence to myself of the value in persisting with 5x4. Along with, ‘do I see those satisfactions’, I’ve also asked myself ‘what exactly are they’? I’ve answered yes to the first question and ‘I’m not sure’ to the second. It’s the ‘not sure’ that’s the point of this post.
Two qualities apparent in the contact prints that I would expect in see in my 5x4 work are sharp details and a wide, appetising, tonal range. Indeed, this may be the nub of it, and there may in fact be nothing more to say. It is, after all, customary to admire the detail and enlarge-ability of large format.
Yet there is that something more, a peculiar combination of elements; certainly tone and sharpness, but also the extensive rendering of fine details, a grandiose air, a certain look derived from focal length and the 5x4 format, a specific kind of depth of field, an expansive and airy tonal modulation across the image, leading the eye on a journey from centre to periphery and back again. It’s very hard to say what exactly, but I suspect it comes from the peculiar possession and combination of these elements. A ‘magic’ (for want of a better term) of the medium and the satisfactions it gives in translating the world we see with our eyes.
Photography is a representation or simulation of the visual world, and it seems to me that 5x4 has a peculiar excess of detail that our everyday vision (with its blurred periphery and constant scanning movements) lacks. It’s not just the ability of a large negative to render fine detail, but also the extensive depth of field that can be achieved with small apertures in combination with camera movements, that conspire to make this excess possible. It’s a physical feature of the medium I’m sure (my ‘magic’ is not metaphysical), but one I struggle to define precisely. Given a little more work and attention to the medium as I go, I may reach such a description in the future.
Have I glimpsed enough magic to continue undeterred (at least for now)? The answer in the affirmative has been given above. It’s nothing more than a sketch, but it is a start.

Scouting for locations in Cheadle, Satffordshire. The image was made on my diminutive Sony RX100 compact camera - great for 'sketch' images such as this. I was looking for a place to make a large format image.
Quiet on the blog front (and large format frustrations)
Regular readers will have noticed it's been somewhat quiet on the blog front around here. Apologies for the small hiatus, it's been a product of several factors, not least the Easter holidays (and a spot of long overdue DIY at home).
Speaking of holidays, I did have a short break with my family in a splendid woodland location. This place lent itself well to large format photography, and I enjoyed some time continuing with said project. I have yet to develop the exposures I made, so I can't comment on any results. I can't say I settled into the process with any ease, indeed the opposite was most probably true. I noticed a few things.
Large format is a physically demanding discipline. Even with my lightweight Intrepid camera (and admittedly not-so-lightweight old school Manfrotto tripod), the gear plus modest hiking led to some tired muscles (ok, sedentary me needs to get used to this bit). I really wanted to be inspired .... but wasn't. Lastly, and on reflection, my natural instinct was to make all the while like a small format photographer: look, shoot, move on, repeat. Large format just doesn't let you do this. Numerous times I set up quickly (camera onto tripod, metering etc.), only to turn my nose up at the scene, or pack up to the pull of 'what might be over the next hill'. I was going just too fast for LF.
This isn't a verdict on LF for me, just where I am right now. From time to time I had a whiff of the possible satisfactions of the format, but for now they remain just that, a promise of satisfactions to come. The learning curve isn't just about the gear or the pace of shooting a single frame. Like all types of photography, there's a whole MO and frame of mind.
I hope you all had a pleasant Easter.
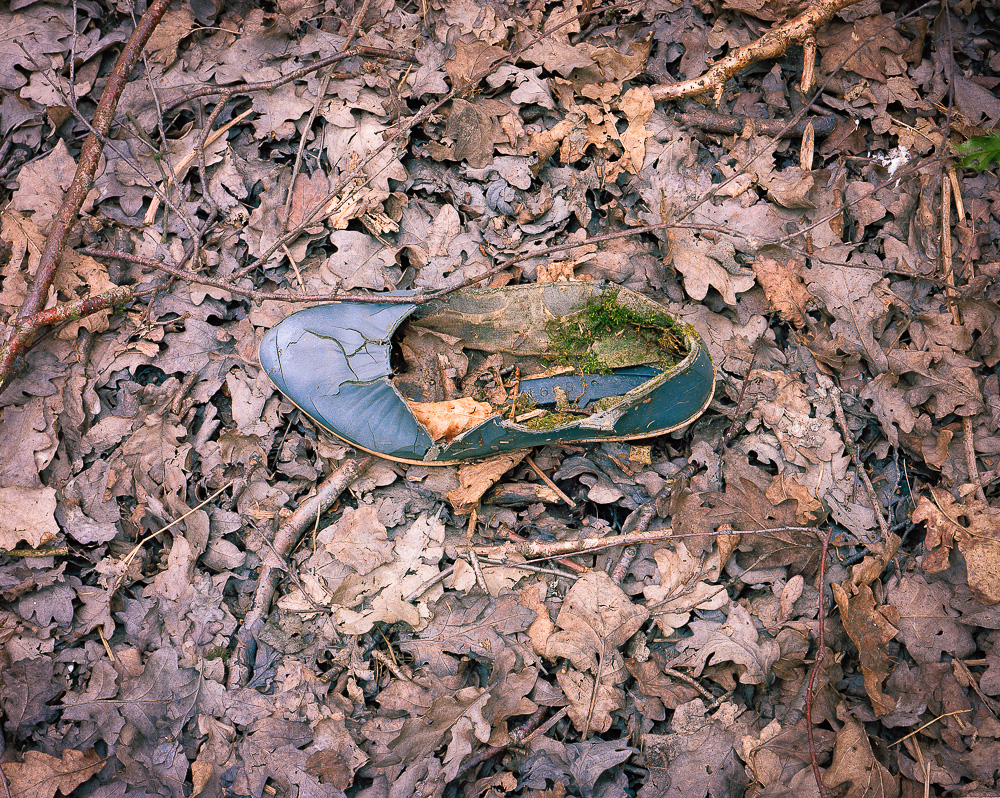
P.S. If anybody comes across a cable release in the wood pictured above, it's mine. Not the last one I'll lose, I'm sure.

Intrepid Large Format Camera Review
In the style of contemporary reviewers, I’m going to offer my conclusion here at the start. The Intrepid is a superb camera, consisting of the right compromises of design and cost, and ideal for those who are looking to make a first foray into large format. It is, in essence, a great ‘learning’ camera: affordable, light and straightforward to use.
I write this review as an experienced photographer, especially a 35mm one. I don’t have familiarity with a wide range of makes and models of large format camera. If you are looking for commentary on how the Intrepid compares to other, perhaps more refined (and almost certainly expensive models), I’m afraid you will have to look to other reviews. It is a fact that other models offer additional movements that the lightweight Intrepid does not. As you will see shortly, I am inclined to see the Intrepid in the context of its budgetary brief and accompanying design compromise. As a small format photographer who has a long-held ambition to get into large format in a more serious way (I have dabbled in the past), I reason I may be exactly the kind of person the Intrepid is marketed to. That puts me in a good position as a reviewer.

The 'naked' Intrepid, with the lens yet to be mounted.
So what greets you when you open the box? The Intrepid is made in a small workshop in Brighton and immediately strikes you as a handmade object. It is constructed mainly from birch plywood, along with metal and plastic knobs, threads and gears. The aesthetic is resolutely ‘utilitarian’, and to my eyes, there is a certain beauty in this.

The camera is constructed form birch plywood and mainly metal parts.
The finish is rugged, business-like and a little, well, unfinished - by which I mean it is not sanded and treated to the smooth furniture-like skin of other more senior models. We are meeting here some of the compromises of which I wrote a moment ago. (As this review progresses I will develop this idea of compromise because I think it is essential to arriving at an informed judgement.) Along with the finish, one also notices a characteristic smell. The wood is protected with and has the sweet smell of wax. This smell persists as you put the camera to use, and I personally found it pleasurable and evocative of my experience with the Intrepid.
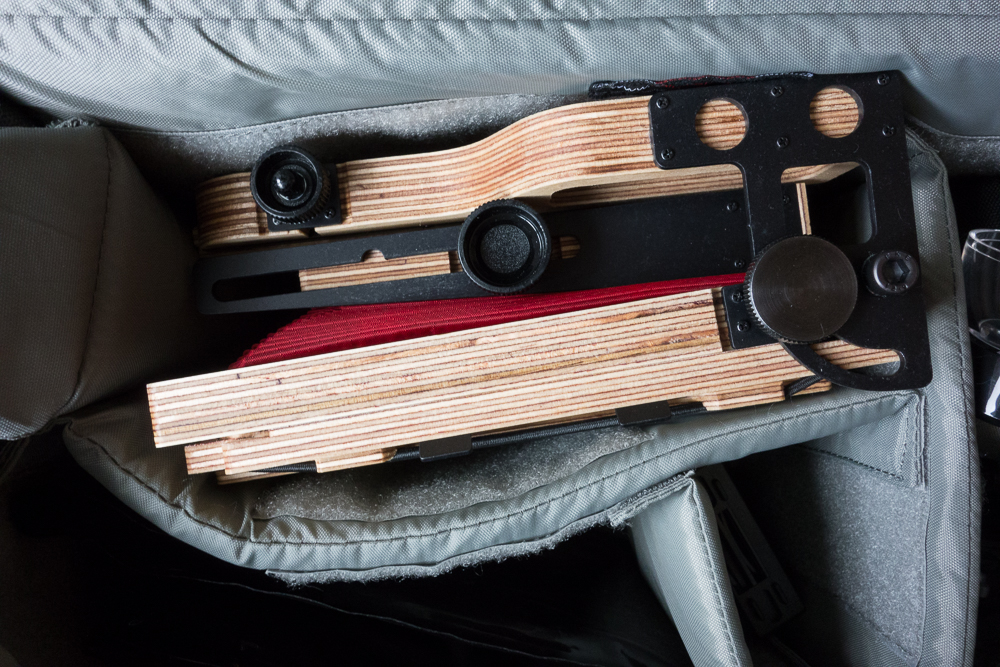
The camera in it folded position, tucked away, and taking up minimal room, in my camera bag.
The camera begins folded down, and, with some simple movements and a little tightening of the appropriate knobs, is ready for business. The rear of the camera simply folds up at a ninety degree angle and this, when tightened, is where it is left. The designers have decided to leave the rear standard without adjustment and this simplifies setup and use (although naturally reduces flexibility, especially if you are use to extensive movements). The front standard is more complex offers rise and fall as well as tilt and swing.
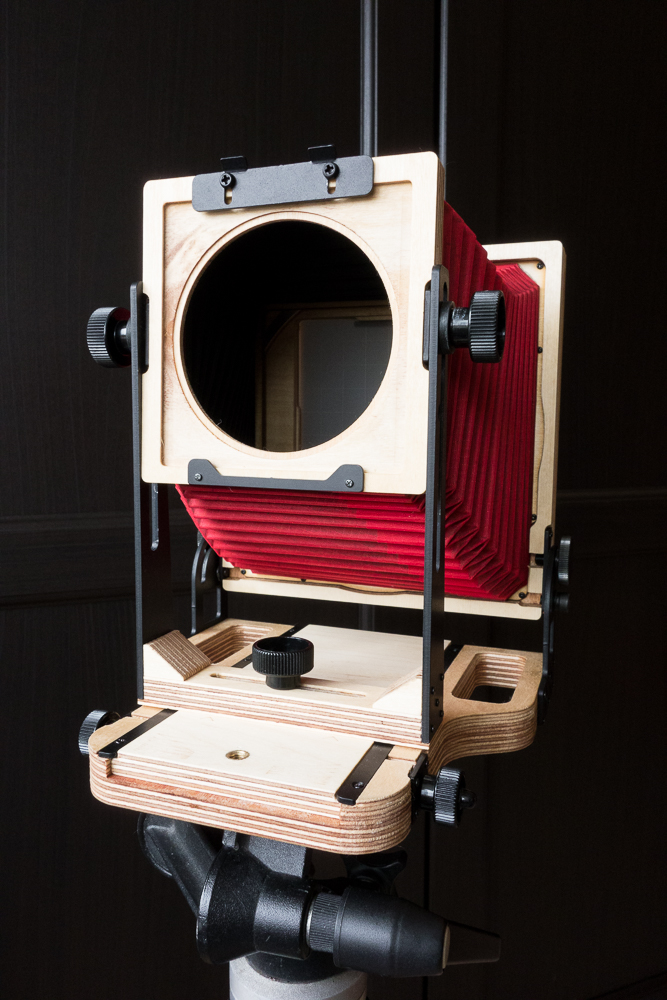
The camera's front standard, set in the 'rise' position.
The bellows are flexible, if a little stiff to begin with, and extend far enough to offer some great close-focussing. The camera takes Technika style lens boards and will accommodate a wide range of lenses from what, at the time of writing, is a very plentiful second hand market (I can’t see anyone buying a new large format lens for an Intrepid, but I suppose folks have their own circumstances and needs).
The rear of the camera is interesting and has been very carefully thought through. The camera comes with a ground glass (with useful grid lines etched on), and the focussing plate is attached with thick elastic rather than the more conventional springs. The back is eminently flexible, having Graflok clips, and will accommodate a wide range of alternative backs (polaroid would be one obvious choice). The mechanism for changing from portrait to landscape is of the rotating kind. One simply puts one’s finger in the corner at the rear and with a gentle push the rear section (complete with ground glass) will spin and the format change is achieved. A great mechanism (I believe there is a round metal track inside) that is very practical.
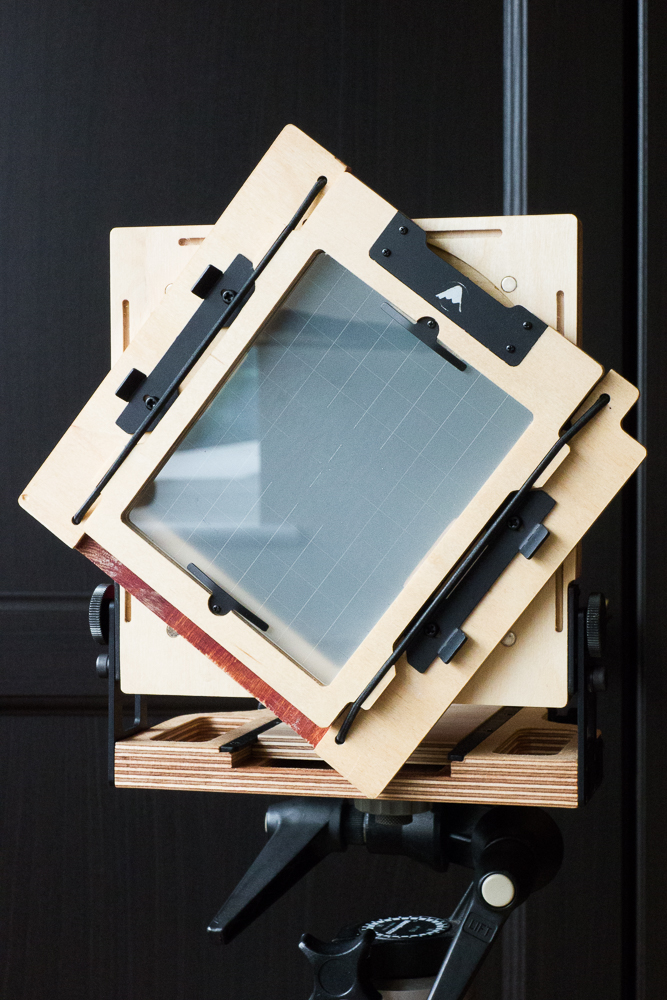
Switching from portrait to landscape is surprisingly easy, thanks to the rotating back.
It is all very well considering the camera and its controls in isolation, but how did I find it to use? In short, it was a pleasure. Large format cameras are essentially simple things, a frame to hold film and a lens at the other end, with a spacer (and darkness, one hopes) in between. Indeed, it is somewhat ironical with large format photography that while the equipment becomes much simpler than sibling formats, the shooting procedure is complex and very demanding of the photographer. The workflow has many aspects, and with that, many ways to make mistakes.

One of my first shots with the Intrepid. Scan of a contact print on warmtone resin coated paper. Film is Ilford Delta 100.
It does take some time to learn how to setup and use the Intrepid, but this soon becomes second nature, and really the time it takes to get the camera from folded to shooting is very short indeed. There are a number of knobs that need to be tightened, as described above, and one soon learns where these are and how much pressure needs to be applied so as to get solidity without risking damage to the camera’s threads. There are three different positions for the front standard, depending on the focal length of lens you are using. These are usefully marked out for you, and there are metal female threads to receive the securing knob. The front standard itself has a notch cut in it that the screw shaft goes through, and I did wonder whether a metal part here would guard against wear in the longer term. Pure speculation on my part, because I haven’t tested this for any great time (nor can I, yet) and the wooden notch may prove to be tough and perfectly adequate.
I was quite surprised to learn that glass had been used to make the focussing screen, largely because I expected that, given the cost of the camera, this was a logical place for a plastic alternative (and thus a saving). The Intrepid Camera Company should be applauded for their commitment to quality here. I was using an f5.6 lens and generally found the screen to be bright enough at this aperture. It is trivial to change the screen to a brighter model (finances permitting of course), and something I can see myself doing in the future. Again, I think what you are given with camera is completely in keeping with the philosophy of Intrepid - the camera is ready to go and will serve you well as it is.

A still life demonstrates the close focussing abilities. Here the bellows are extended, but could extend more. Another scan of a contact print and again Delta 100 film.
Next comes inserting the film holder and making the exposure. Of the many aspects of large format workflow that will be new to the 35mm photographer, this operation is perhaps the most intimidating. It's intimidating because, once the film is inserted, you have gone ‘blind’ (no more image on the ground glass). Not so much of an issue with static subjects on a windless day, but with real live subjects, a whole other level of challenge. Having said that, I should remind myself that a goodly part of my own motivation to shoot 5x4 is precisely this kind of risk - and thus excitement and anticipation - that the process provides. Take away such elements and the possibility of significant mistakes, and the victory of a well-exposed sheet of film is surely less sweet.
The camera did perhaps play its own role here. There is considerable movement when the film holder is inserted, and one has to be really careful not to knock anything out of position (remember, you have done your critical focussing at this stage and want all elements to remain exactly where they are). The elastic that holds the focussing screen section in place is pretty strong, and in a way needs to be, but this does contribute to stresses and strains on the camera body as the holder goes in. My solution has been to disengage the top two elastics to allow the film holder smoother passage. I don’t think there’s too much the designers can do about this, it is, after all, simple physics, given the materials and construction involved. I should also note that I haven’t seen any discernible impact of this on actual images, even those shot wide open. At smaller apertures depth of field will allow greater play and allow more margin for error.

An environmental portrait of my colleague David (thank you to another generous sitter). Scan of a contact print, this time Ilford HP5+ film.
Before I move on to my conclusion, I’d lastly like to address the question of weight. You don’t need to have extensively handled heavy large format cameras to know that the Intrepid is a light camera. Weighing in at just 900 grammes, it is a camera that will surely encourage use and will doubtless be picked up by photographers ahead of their other large imaging systems. The question of what you can carry depends on a number of individual variables, such as where you are travelling to and how, and of course your own physical strength and capabilities.
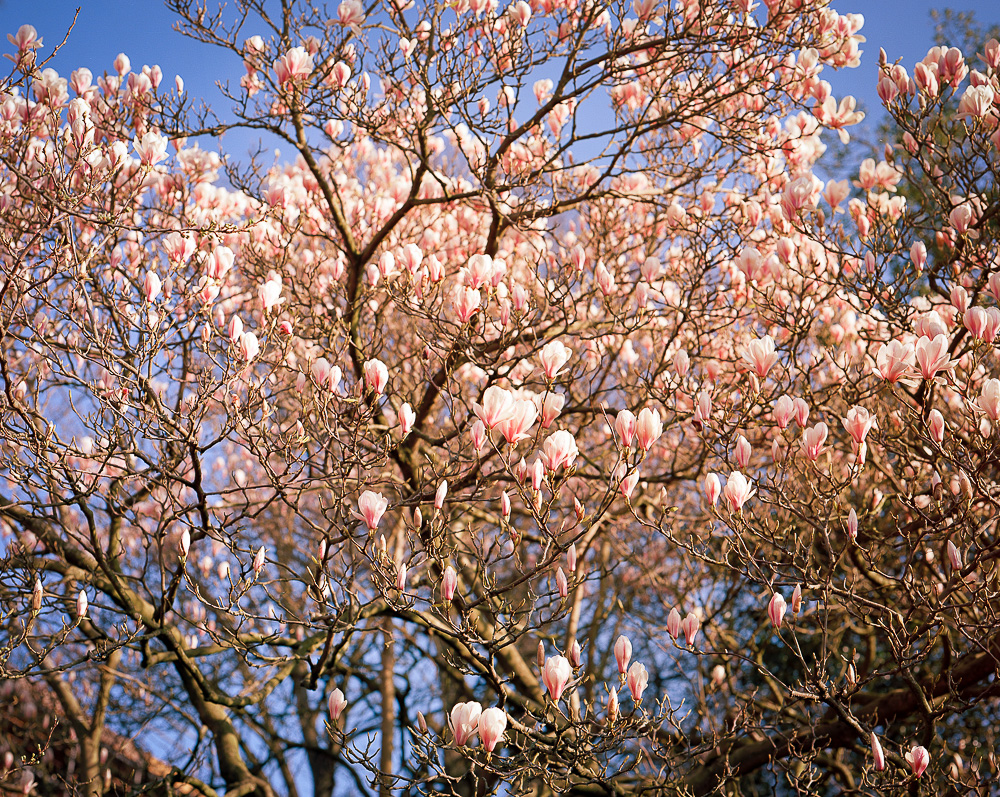
A mature Magnolia tree bursting into bloom provides plenty of colour for sunshine-loving Kodak Ektar 100 film.
This is surely the wrong comparison to make, but next to my other kits there is no doubt that my Intrepid bag is noticeably bulky and heavier. I don’t think that would prevent me from carrying the Intrepid however, and I had at any rate employed an old bag replete with pockets and padding, and can imagine formulating a much more compact kit based on alternative bags (the market is hardly bereft of options today). In summary, if you are new to large format, you will not be able to avoid the bulk of film holders, dark cloths, loupes, lenses, 5x4 film and so on; but you have a huge advantage with the Intrepid as your camera of choice.
The detail in 5x4 negatives is impressive. With top class scans very large prints are possible. Film is Kodak Ektar 100.
I now want to end this review with a little qualification of an earlier statement about design choices, because this will help form my conclusion and is the basis of my high regard for the Intrepid. I think there are a number of areas where the Intrepid could be improved, some of which have been raised here (and will be raised in other reviews). Yet we do have to bear in mind the design brief for an affordable, lightweight, accessible 5x4 field camera. The work of design is in essence the work of compromise. You have a set of constraints, financial and practical, and must make the best decisions you can to fashion the product you want. Would the camera benefit from built-in spirit levels? Sure. Could the finish be more refined? Absolutely. Could the camera be sturdier? Perhaps. Yet we are beginning to speak of an altogether different object, a thing belonging to an altogether different budget and design brief.
The point for me is that the Intrepid’s designers have made the right set of compromises, given their own brief. There is even a hint of wizardry, given what they have achieved in a product that retails at £250. I had to wait about eight weeks to receive my camera after I had placed my order. I simply accepted this as part and parcel of the aforementioned limitations and parameters (and, in truth, rather enjoyed the anticipation - it felt rather bespoke too, knowing that my camera was being made ‘for me’). In other words, if you want your camera faster, with more supporting products, better build quality and guaranteed longevity, you will simply have to look elsewhere (and be prepared to pay for the privilege). If you are beginning in large format and want something that is going to work straight away (excepting lens and film holder) and do a fine job, look no further than the Intrepid.
You can find out more about the Intrepid and place an order for one here:
Leica M6TTL, Zeiss C Sonnar 50mm lens, Kodak TMAX 100 film developed in Ilfotec HC
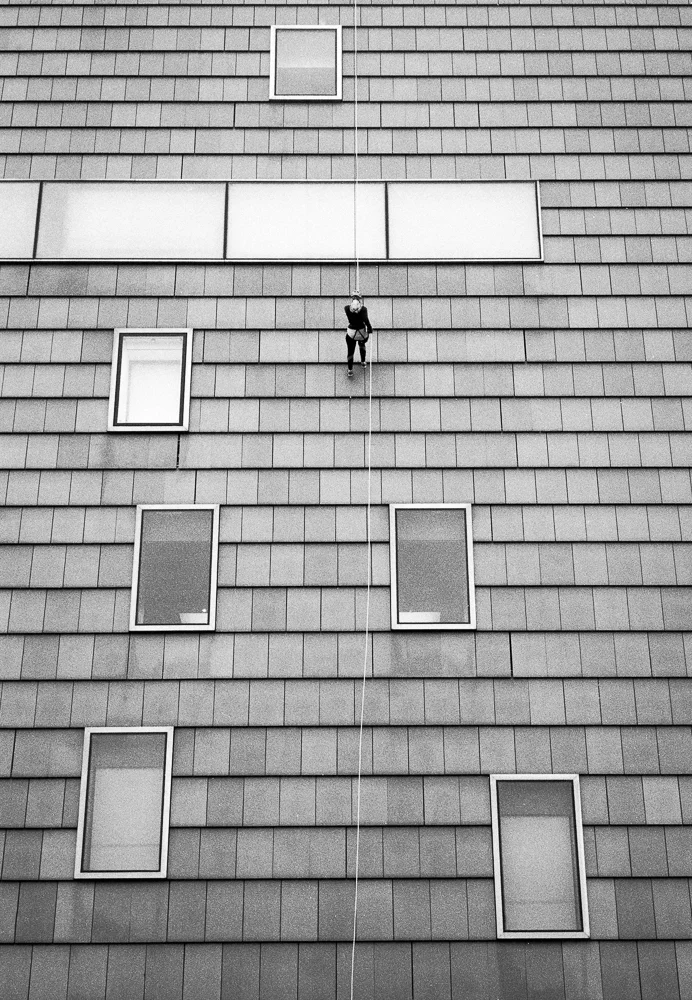
Abseiling

Frank's Barber's Shop. Shot on a Sony A7II with an 85mm lens
Frank's
Something of a rare foray into colour for me these days.
Some images you make because you simply see them, or moreover they have a way of finding you. Others, like this one here, you see time after time (the scene is on my daily journey home) and resolve to make.
I therefore had a very clear idea of the image I wanted, right down to standing position, focal length, and time of day. I knew I wanted the window of the Barber's to be illuminated, so a darker exterior was needed, but I also wanted enough light outside to show framing elements. I chose dusk as the obvious time of day to shoot, supported by some modest Lightroom adjustments. In the event, I was a little early and waited for about ten minutes until the light faded further.
I enjoy the idea of a modest document of a person and his business, and like the further clues of the man's life, such as his bicycle outside. Even with such a modest image, photography has an immense power to document, to provide tiny significant details.
Developer for FP4+ poll result
And so we have a winner ....
Firstly, thanks to everyone who took part. As a little bit of fun, I asked readers to vote for their favourite developer for FP4+, based on Pebble Project gallery results. Naturally, the result is limited by the nature of on-screen viewing and the imperfections of the little poll (sample size and so on). Not a scientific endeavour!
Having said that, the results were interesting. Out of 25 responses (pleasantly surprising in itself), DDX came out on top with 8 votes. It was followed closely by R09, which received 6. Perceptol had 4 votes; Ilfosol and HC garnered 3 each. LC29 received but 1, which is quite surprising given its balance of qualities. I did wonder how much the voters' own experiences influenced their vote (i.e. was the vote for developer familiar to them, rather than a judgement of the Pebble results).
I will leave the poll open, which opens up the possibility of returning to it at future date to see if the results remain the same.
Which developer for FP4+ film?
Here's a bit of fun.
I thought I'd run a little developer popularity contest, based on Pebble Project results and FP4+ film (which I have the most results for). I'm asking you to take a stab at your favourite using on-screen results, so no need to be too precious (of course, you may have your experiences to draw on too).
Results to follow!
P.S. Pebble Project gallery can be accessed under 'resources' on the main menu, or just click this link:
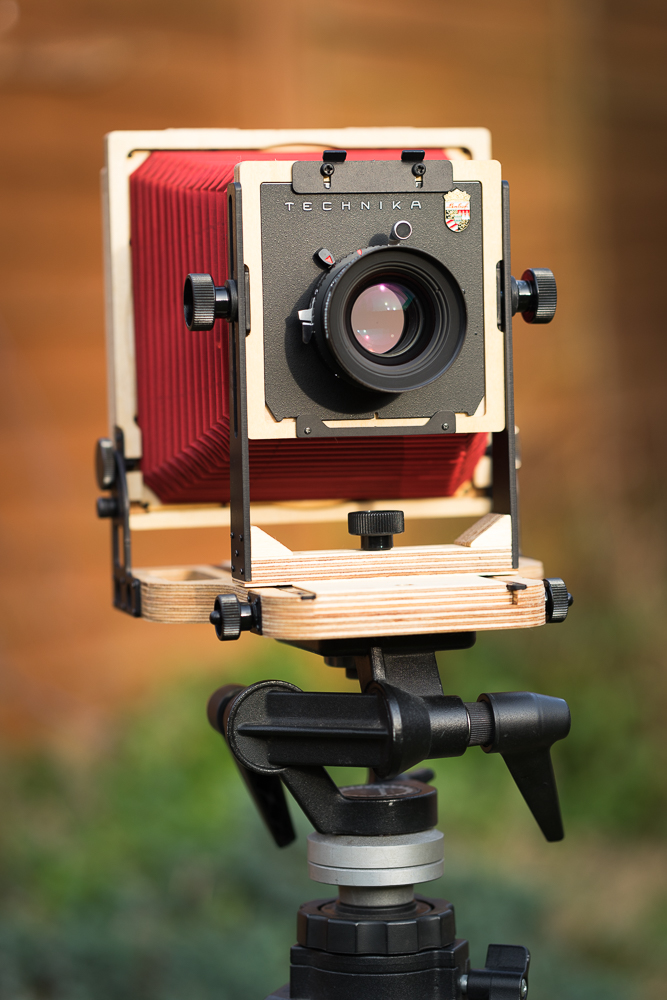
The Intrepid camera, bellows extended, focussing close up on a little still life.
Learning large format
My large format adventures have begun in earnest and I’m starting to build some familiarity with the Intrepid field camera. I have a few observations and feelings to share with you right away, but am working on a more detailed review of the the Intrepid which will be coming soon. If you think you might be interested in taking up large format (LF) photography, or, if you are already into it and are considering buying an Intrepid for its weight advantage, please do check out my review.
The common wisdom on the nature of photographic formats has already taught me very well that I should expect to ‘slow down’ when doing LF. Surely this is true, but I have discovered other concerns in what little time I’ve had with my new camera, and have been given pause to reflect on some interesting considerations.
First, there is the physicality. LF is a physical and tactile operation. I was given good advice to simply learn how the camera works, without worrying about making any pictures. I am impatient too, so make pictures I did, and was aware that there is a great deal to set up when making a LF image.
LF is not something the photographer is going to enter into lightly. There needs to be a very good reason to make an image. You can’t bury a number of cheap shots and ‘fun’ indulgences as you can on a roll of thirty six frames. There’s simply too much time and cost involved, and you are heavily invested in the image you have made. It seems the stakes are very high with LF, but the payoff is substantial if things come together.

Every large format image made will be an investment in time and money. No indulgent test shots here!
Now while my fingers had a great deal to contend with, I quickly learnt my way around the camera and before too long became much more confident. This really is like using a manual 35mm film camera, in the sense that, once learned, your brain goes into a kind of ‘autopilot’ mode, a bit like a driver who stops thinking about gear changes and clutch sequences and simply drives. Hand me any one of my digital cameras, with their formidable menus, and I wager there is something I will have forgotten how to change or access. The re-learning feels continuous with digital because of this.
I think it’s going to be very different with LF. I can hardly claim to have learned all the movements and workflow nuances, but it does fill me with confidence that my investment in effort and time will result in a thoroughly ingrained, automatic, practice. I guess we might say that this is just as well because there is a lot to deal with!
As a 35mm photographer the loss of the ‘image on the fly’ was immediate and obvious. It’s no exaggeration to say that with 35mm I am looking to make pictures all of the time. If an opportunity presents itself, the small camera comes out, does its work in one hundred and twenty-fifth of a second (allowing for a few more seconds of decision making and a pause for the right moment), and is put away. One can be ‘out there’ photographing and go largely unnoticed.
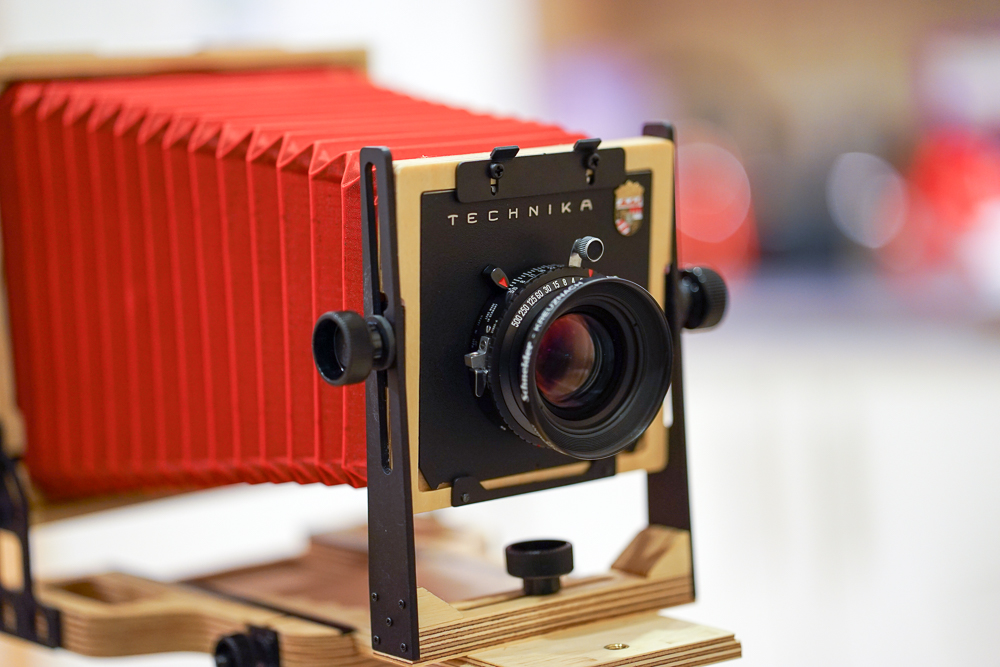
My not-so-discreet Intrepid, complete with red bellows. Not a machine for stealthy street photography.
With LF I am really going to have to want to take an image. I am going to stand there, for some considerable time (hoping my technique is getting more fluid, but certainly not wishing to rush the workflow and get it wrong, and there are so many ways to get it wrong!), with my handsome but attention-grabbing red bellows (did I choose the wrong colour?), standing, senses momentarily muted, under a dark cloth, trying so very hard to concentrate on exposure values, aperture choice, subject movement, and so on. Oh please don’t let anyone try to talk to me! The secluded spot in nature suddenly looks very attractive while I earn my stripes.
And then there is taking LF images of people. I am curious as well as impatient, and there was no way I was going to omit this type of image making from my early experience. Yet it is a curious thing! You are thoroughly shackled by formality, and have to look for an instance where your subject can be ever so slightly natural, in an essentially unnatural situation.
You must place your subject and weigh-up the lighting in the scene. It is actually preferable to scout or adjust your scene before your subject arrives. If light modification needs to happen, it is best done in advance. You are going to have other things to worry about when your subject is in place. So your sitter arrives and you settle on a pose. You carefully survey the image on the ground glass. You have to keep engaging your subject - as any portrait photographer does - as you begin to check your workflow and finalise decisions of exposure, aperture and shutter speed. You make and check focus. You are still talking. Still engaging, showing that you are in control. Then comes that curious moment, the reason I write of a shackling formality.
You insert the film holder and are now working ‘blind’. You have requested your subject to stay in position, but have not yet pressed the cable release. You are faced with a Hobson’s choice: expose too early and risk a wooden pose; leave it too long and your subject will have strayed from the zone of focus and changed your composition. You are in search of a ‘moment’ within a moment. A happening in an ever-so-modest window of time. It is a wonder LF portraits are ever made!
Excuse me if I exaggerate for effect, but I think these observations have a validity and point to real differences in photographic formats (I’m assuming here that medium format is in many ways closer to 35mm than LF as far as the above is concerned). I have naturally made some exposures, and while I have perhaps inevitably made mistakes, I have had some successes too (it is true, LF portraits can be done). I hope to share these and some observations about them in a forthcoming post.

A test strip of my first large format portrait dancing in the wash. This could well be proof that large format portraits can be done.
Watch this space for some more of my adventures with this venerable format.
Tone: a primer (post 5)
Games to play
Welcome to the final post of my Tone: A Primer series.
Today I’m going to look at some exercises you can do in order to sharpen your command of tone in black and white. They are suggestions and starting points and can be modified to suit your own practice and equipment. I have endeavoured to ensure that there is material for both film and digital users, although the final exercise is a film one. They are given broadly in order of difficulty.
1. Play with exposure
If you are relatively new to photography, it is well worth beginning with a simple exposure exercise. Try reproducing the modest exercise I explain in post two (under the heading ‘A sliding scale of grey’). Easy to do, but insightful if you are starting out. You are in control of the tones in your images.
2. Shoot black and white things
I have Jevon Tooth to thank for this exercise. When Jevon showed me some of his great black and white prints, it was obvious that he had deliberately targeted black and white objects in order to hone his vision in the medium (e.g. some very lightly toned grasses against a painted black fence). The thought had never occurred to me! A simple but very effective to way get a sense of how black and white tonality can work in crafting images.
3. Strive for tonal variation
For this exercise, I’d like you to prepare and print an image that contains different areas of clearly distinguished tone. Whether you are working with digital or darkroom, the task is to use dodging and burning (or equivalent tools) to help separate distinct zones within the image, and to use this to draw the viewer’s attention to the main subject.
A warmtone darkroom print showing careful modulation of tone, with a strong main subject that is tonally distinct from its environment.
Traditionally, this involves keeping the subject (especially if a person) fairly light tonally (this catches the eye) and to darken surrounding areas, particularly edges, so as to create a frame. Darkened edges are known as a vignette.
Yet further than this, it is important to make decisions about how to create a sense of contrast between the image zones. Perhaps a very light area of window light needs to burnt-in just a tad, so as to lend a little more solidity to it. Maybe an area at the end of a road in a landscape needs lightening to distinguish it from surrounding trees and to lead the viewer’s eye through the image. Perhaps a little collection of objects near the bottom of the frame is too light and competes with the subject that is more central. Knock it back with a gentle burn-in.
4. Shoot the zones
This exercise was devised by John Blakemore. It assumes some familiarity with the zone system, or, at least with the tones that are demarcated by it. Summaries of the zones and their corresponding descriptions abound on the internet, so one of these is a good place to start.
You begin by choosing a zone and attempt to make a photograph that encapsulates its mood. So, I might choose zone four, say, looking carefully at the tone given in the charts and mulling over the description I have found of ‘average dark foliage, dark stone, landscape shadow’.
The challenge with this exercise - and a challenge it indeed is - is that you are trying to make an image that still holds a range of tones, but that somehow summarises the feeling of the zone in question. You may of course use any development or printing controls you have at your disposal to make the print that you think is appropriate. There is no right or wrong to this, it’s simply a very good exercise for understanding the tonal range available to black and white photographers.

Excepting some of the lighter areas, in particular the cottage, this image strikes me as having something of a zone three / four mood.
5. Make a ring-around
For this exercise I’m going to assume that you are using a film (and developer) with some regularity, and that you have a pretty well-established development regime.
You will need to shoot three rolls of film. Firstly, shoot your typical subjects at ‘box speed’ (i.e. the ISO as stated on the film box). For example, if you are shooting HP5+, you would go with 400. It does help to have one or two test subjects (e.g. a given room with consistent lighting) that will provide a reference point across the films.
Next, you shoot more of your typical subjects (re-do that test subject too) but this time at a stop under and a stop over that box speed. You might simply want to change the ISO on your camera, so that you can simply get on with shooting. Therefore, in my 400 speed example, I would shoot some frames at 800 and some at 200. It takes some discipline, but it’s really worth making note of all your exposures as you do this exercise.
When the films are finished you then develop them in the following way. For the first you follow the manufacturer’s guidelines for the developer in question. Opening up my box of HP5+ I find a handy chart which will tell me the time with the developer I'm using. For the next film you add 20 percent to the development time, so as to ‘over-develop’ the film. You may have guessed that for the remaining film you are going to reduce the original manufacturer’s time by 20 percent. This will give you ‘under-development’.
When you are done developing you make a contact print of the results, in your usual manner. In the following image you can see just such a contact print, here showing the ‘normal’ development, and what is labelled +1 and -1, meaning our +20 and -20 percent. I have asked you to do a lot of hard work so far, but already you have a lot of really interesting information. Do you prefer the manufacturer’s development time, or the over- or under-developed version?
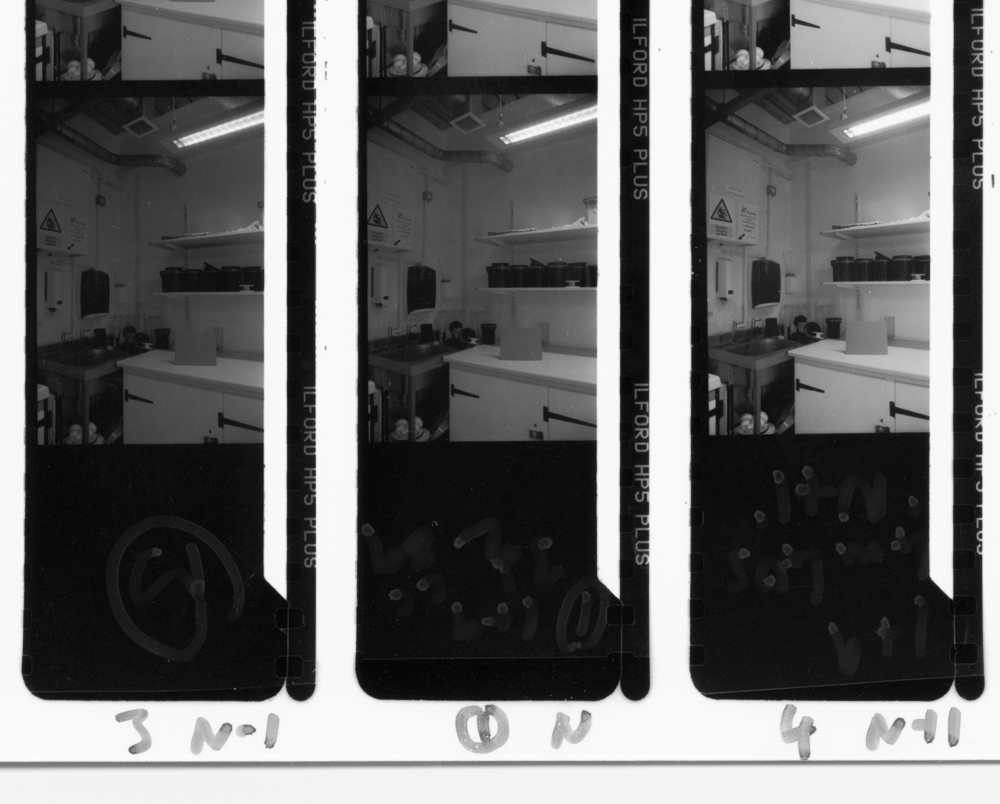
Contact print showing 'normal' development (centre), under-development (left) and over-development (right)
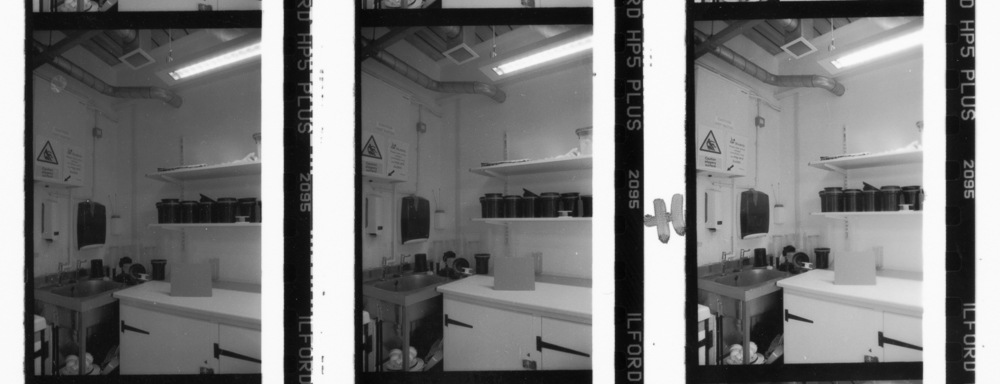
Next you can look for frames that you overexposed. What do you think of overexposure and underdevelopment? Or of overexposure and overdevelopment? Which tonality do you prefer? Here is my contact print showing overexposure. The development sequence is the same as the image above, so left under, middle normal and right over.
The underexposed frames then complete the picture. Again, which is the best tonality, for you and your typical subjects? What does the test scene suggest?
There is some more work to do, because this exercise can be brought to a brilliant conclusion. The last step is to print a selection of the images (logically you’d do nine, as suggested by the contact prints above) aiming for the best possible print in each case. In other words, you don’t print them all to some standardised time and grade, but make the best possible print using all the usual controls that are available to you.
You now have a huge amount of information about your shooting and developing regime and with luck some interesting new exposure and development settings to trial over a longer period. You are not stuck with whole stops or indeed 20 percent, but can make further refinements as you progress. Not a quick or easy exercise but potentially a very fruitful one.